(Reference) DHT
DHT - Temperature and Humidity Sensor

Sensor Type
Important! There are different styles of DHT sensors, and they need to be connected and programmed differently. Make sure to verify which sensor you have before proceeding.
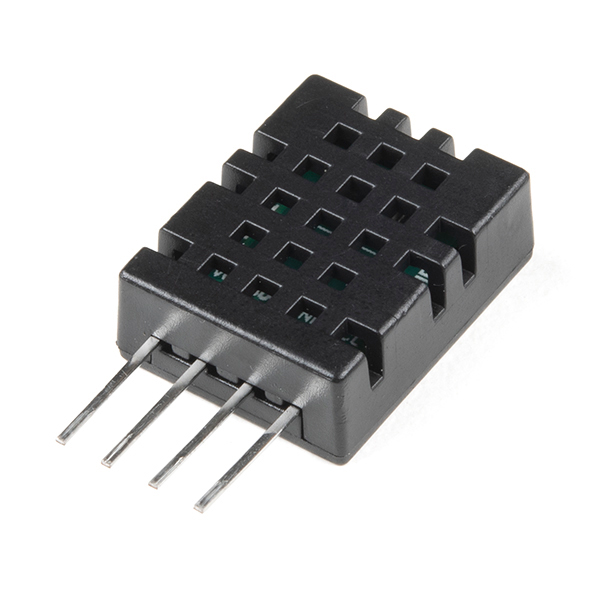
DHT 20
Wiring Guide - DHT 20 - 4 Pins
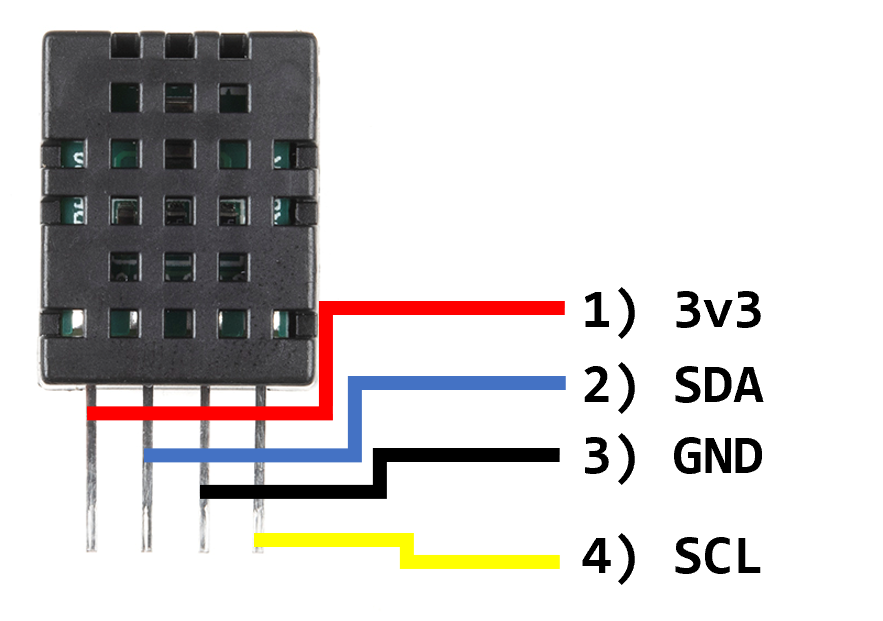
- 3.3V
- SDA
- Ground
- SCL
Wiring

Note: In Fritzing, if you don’t find a DHT 20 (black), you can used the DHT 22 or DHT 11 in your diagram.
Operation
- Always wait about 2.5 seconds in between measurements (use
millispreferably for this instead ofdelay)
Library
- We need a library to handle much of the complex communication with the OLED
- To install a library, go to the command palette and type
Install Library - Install the OLED library:
DHT_I2C_Particle
Examples
- There are extensive examples in the library folder under
lib/examples
Code
- The following code example will read the temperature and humidity at 2500 millisecond intervals
//
//    FILE: DHT20_simple.ino
//  AUTHOR: Rob Parke based on work by Rob Tillaart
// PURPOSE: Demo for DHT20 I2C humidity & temperature sensor
//

//  Always check datasheet - front view
//
//          +--------------+
//  VDD ----| 1            |
//  SDA ----| 2    DHT20   |
//  GND ----| 3            |
//  SCL ----| 4            |
//          +--------------+

#include "DHT20.h"

DHT20 dht;

void setup() {
    dht.begin();
    Serial.begin(9600);
    delay(1000);
}

void loop() {
    int status = dht.read();

    if (status == DHT20_OK) {  // valid read
        Serial.print("DHT20 \t");
        Serial.print("% Humidity: " + String(dht.getHumidity()));
        Serial.print("\t");
        Serial.print(String(dht.getTemperature()) + " C");
        Serial.print("\t");
        Serial.println(String(dht.getTemperatureF()) + " F");
    } else {
        Serial.println("Invalid read");
    }

    delay(1000);
}
Notes
- Always wait about 2.5 seconds in between measurements (use
millispreferably for this instead ofdelay)
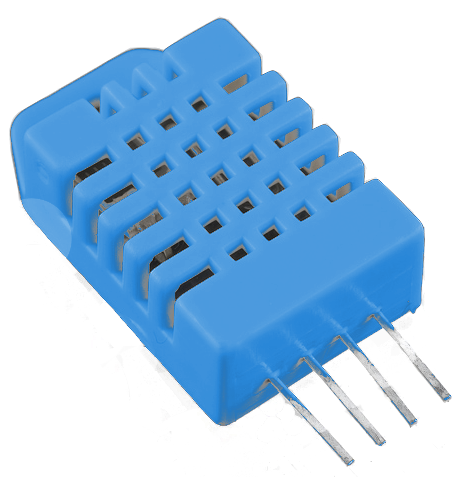
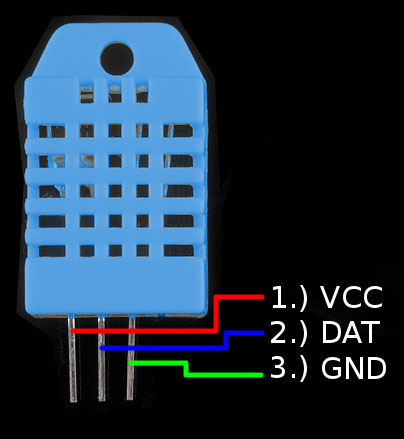
DHT 22 and DHT 11
Wiring Guide - DHT 22 - 4 Pins
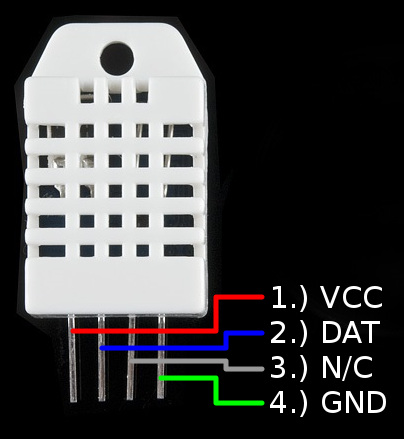
- 3.3V
- Digital input (needs 10k pull-up resistor)
- No connection
- Ground
Wiring Guide - DHT 11 - 3 Pins
- 3.3V
- Digital input (needs 10k pull-up resistor)
- Ground
Wiring Guide - DHT 11 and DHT 22
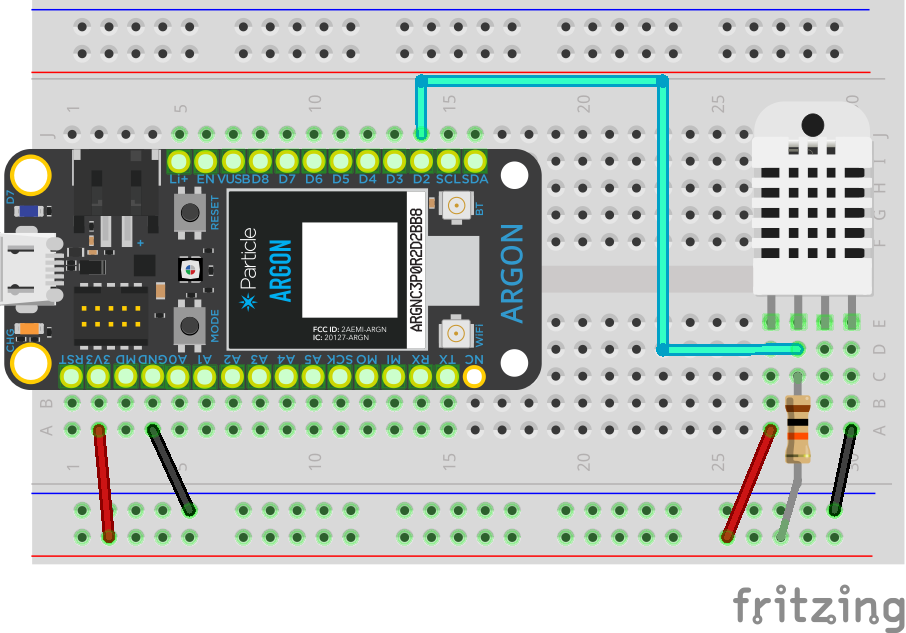
Note: The wiring for the DHT 11 and DHT 22 is the same
Operation
- Always wait about 2.5 seconds in between measurements (use
millispreferably for this instead ofdelay)
Library
- We need a library to handle much of the complex communication with the OLED
- To install a library, go to the command palette and type
Install Library - Install the OLED library:
PietteTech_DHT
Examples
- There are extensive examples in the library folder under
lib/examples
Code
- The following code example will read the temperature and humidity at 2500 millisecond intervals
#include "PietteTech_DHT.h"

#define DHTTYPE DHT11  // DHT model you have
#define DHTPIN D2      // DHT data pin

PietteTech_DHT dht(DHTPIN, DHTTYPE);

float h;
float c;
float f;

unsigned long prevMillis = 0;
unsigned long updateDelay = 2500;

void setup() {
  Serial.begin(9600);
  dht.begin();
}

void loop() {
    unsigned long currMillis = millis();
    if (currMillis - prevMillis > updateDelay) {
        prevMillis = currMillis;

		int result =
			dht.acquireAndWait(1000);  // wait up to 1 sec
		if (result == DHTLIB_OK) {
		  h = dht.getHumidity();
		  c = dht.getCelsius();
		  f = dht.getFahrenheit();
		  Serial.println("Humidity: " + String(h, 1) + " %");
		  Serial.println("Temp (F): " + String(f, 1) + " deg F");
		  Serial.println("Temp (C): " + String(c, 1) + " deg C");
		} else {
		  Serial.println("Invalid reading");
		}
	}
}