Scanning Light
Assignment 3 – Scanning Light
Goals
-
Connect LEDs to Photon 2
-
Read analog input with a potentiometer
-
Control scanning LEDS with potentiometer
-
Use PWM to change LED intensity
Overview
This assignment is to create variable scanning / oscillating light pattern on 5 LEDs. The scanning rate will be controlled with a potentiometer. This pattern is often seen in TV and films such as KITT from Knight Rider and the Cylons from Battlestar Galatica.
The light pattern will oscillate from right to left and back again. As the potentiometer is turned, the lights will blink faster or slower. However, in addition to the rate changing, the intensity will also change (more bright to less bright.
Here is an example with 7 lights.
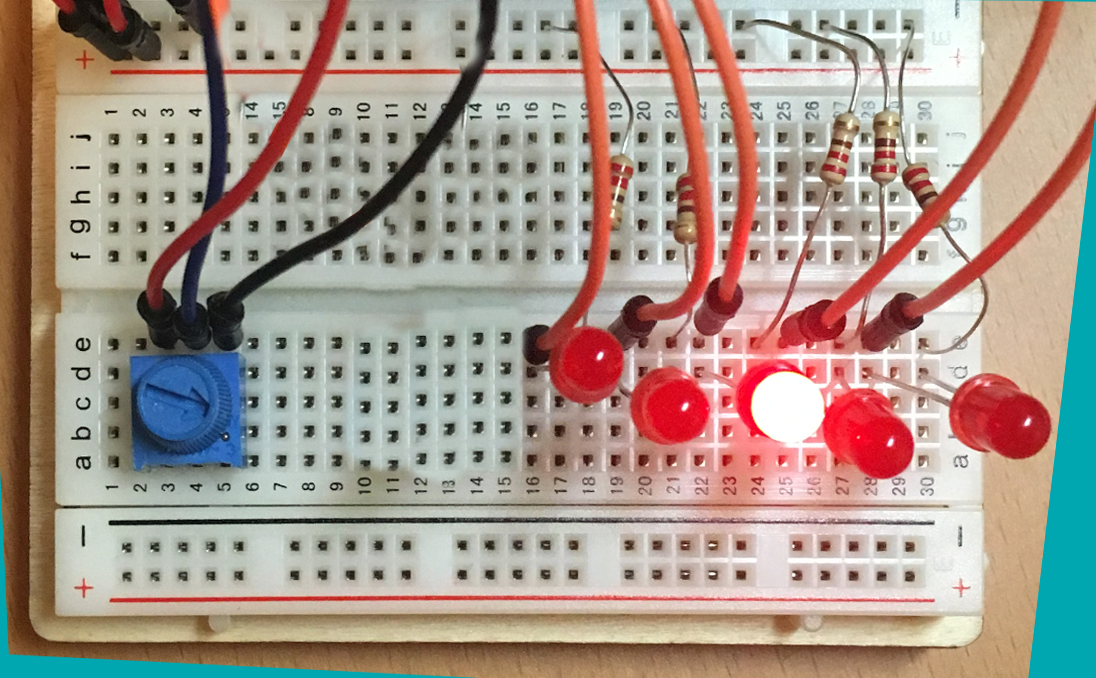
Components
-
Photon 2
-
Breadboard
-
5 x LEDs
-
5 x 330 Ohm resistors
-
1 x 10k Ohm potentiometer
-
Jumper wire (standard header-header)
Requirements
- Connect five LEDs to Photon 2
- Hint: since you are going to control the brightness using PWM, think about which pins you should you
- Connect potentiometer and read value
- Within
loop, use the potentiometer to control both the blink rate and the brightness - Blink rate:
- The potentiometer value should be used to control the delay value between each light blinking
- Fully clockwise: the lights blink so fast they “seem” to all be on constantly
- Fully counterclockwise: the lights blink very slowly
- Brightness:
- Potentiometer controls the brightness of the lights using PWM
- Fully clockwise, the lights should be bright
- Fully counter-clockwise: the lights should be very dim (Note: the lights should by dim, but not turn off)
- Do not use a
whileloop inside theloopfunction. You can either use a counter to track the LEDs or aforloop
Bonus
- Create an enclosure for your project that shows the LEDs and potentiometer and hides the breadboard.
- Use a for loop to iterate through the LEDs (hint: this will require the use of an array, which is like a C++ list).
Naming convention
(replace # with the current assignment number)
-
Project Name:
itp348_a#_lastname_firstname -
Zip File (project folder):
itp348_a#_lastname_firstname.zip
Video Submission Checklist
To receive credit, your submitted video must clearly demonstrate the following:
-
LEDs oscillating at least three cycles back and forth
- Slowly turning potentiometer clockwise
- LEDs blink faster and get brighter
-
Slowly turning potentiometer counter-clockwise
- LEDs blink slower and get dimmer
- When fully counter-clockwise, lights should be dim but not off
Deliverables
-
A compressed file containing your project. Follow the guidelines for full credit.
Here are the instructions for submission
-
Navigate to your project folder.
-
Include the entire folder in a zip file
-
Rename the zip file based on naming convention
-
Upload zip file to Brightspace site for our course
-
-
A photograph of your device connected to USB with the cyan light on (indicating it is connected).
-
A video demonstrating your project functioning (either upload this to separate from the zip file, or upload to YouTube / Google Drive / Dropbox and provide the link in your submission).
Grading
| Item | Points |
|---|---|
| Components | |
| 5 LEDs wired with resistors | 1 |
| Potentiometer wired correctly | 1 |
| Components initialized properly | 1 |
| Blink Rate | |
| LEDs oscillate in one direction and back | 4 |
| Potentiometer increases blink rate | 4 |
| Brightness | |
| Potentiometer increases brightness | 4 |
| When potentiometer is counter-clockwise, lights are dim but still on | 2 |
| Looping | |
Counter variable or for loop used (not while) |
3 |
| Total | 20 |
Credits
- Inspiration for project from Dr. Peter Dalmaris