Installation with Particle App
IMPORTANT: This is an older way to claim and configure your Photon 2. This method tends to have more bugs so it is advisable to try using https://setup.particle.io before this method.
Assignment 0 – Installation with Particle App
Nothing to submit
Requirements
- Create Particle account
- Install Particle Workbench
- Install Fritzing
- Add photon 2 device to your Particle account
________________
Create Particle account
In this course, we will use an internet-enabled microcontroller, specifically the Particle Photon 2. In order to communicate with the Photon 2 (e.g. to install new firmware code), we will use Particle’s cloud software.
-
Open the internet browser of your choice and visit the site:
https://www.particle.io/ -
Go to Login and create a new account
Install Particle Workbench
Workbench is the IDE we will use to write firmware code as well as to install it on the device
-
Open the internet browser of your choice and visit the site: https://www.particle.io/workbench/
-
Download and install Particle Workbench
Install Fritzing
Fritzing is a program to create visual layouts of device projects.
-
ITP has paid for a Fritzing support license for the class. To download it, please go to the course Brightspace site and click on “Fritzing Download”.
-
Download and install Fritzing, and then continue these instructions
Install Fritzing Library for Additional Parts
There are additional we will used in class that we need Fritzing parts for.
-
Download the Photon 2 library for Fritzing:
https://github.com/reparke/Fritzing_Collection/archive/main.zip
-
Unzip the file (take note of the folder location)
-
Open Fritzing
-
On Parts panel on the right side of the screen, click the small dropdown menu and choose Import…
-
Navigate to the folder with the file you downloaded and open
ITP_348_Parts.fzpz -
Click the small dropdown menu on the Parts panel again and chose Save Bin
Add Photon 2 device to your Particle account
This step must be completed after you receive the Photon 2 from the instructor. Each Photon 2 device must be linked to Particle account.
-
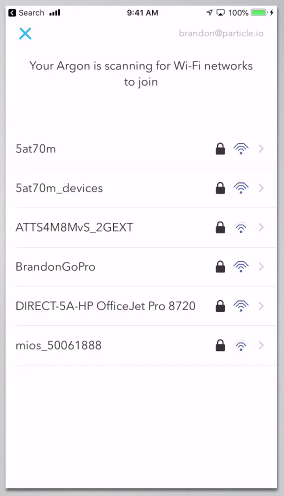
Follow the instructions to claim your Photon 2 and link it to your account:
https://docs.particle.io/quickstart/photon 2/#1-set-up-your-photon 2
-
Complete only step #1 (setting up Photon 2) and do not proceed any further.
Important Notes
- During the setup process, the mobile app will ask if you want to set up mesh networking. Choose the option Do not use in mesh networking

- You may eventually need to connect it to multiple networks (e.g. at USC and where you live), but you will begin with a single Wifi network. When connecting to Wifi at USC, make sure to use USC Guest Wireless, not USC Secure Wireless

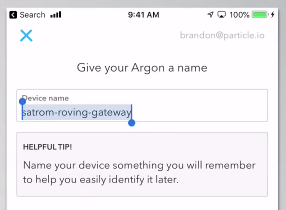
- During setup, you will be asked to provide a name for your Photon 2. This is the name that you will use in your projects to reference your device throughout the semester so make note of it
Deliverables
- There is nothing to submit for this assignment.