Installation and Setup
Assignment 0 – Installation and Setup
Nothing to submit
Requirements
- Connect Photon 2 to Computer
- Create Particle account
- Install Particle Workbench
- Install Fritzing
- Add Photon 2 device to your Particle account
IMPORTANT - Browser
You need to use the Chrome browser to configure your Photon 2; you can not use Firefox or Safari.
________________
Connect your Particle Photon 2 to your Computer
- Connect the antenna (discussed in class)
- Connect the Photon 2 to your breadboard (discussed in class)
- Connect the micro USB cable to your computer
Create Particle account
In this course, we will use an internet-enabled microcontroller, specifically the Particle Photon 2. In order to communicate with the Photon 2 (e.g. to install new firmware code), we will use Particle’s cloud software.
-
You need to use the Chrome browser to configure your Photon 2 and visit this site: https://setup.particle.io
-
Go to Get Started and create a new account for education
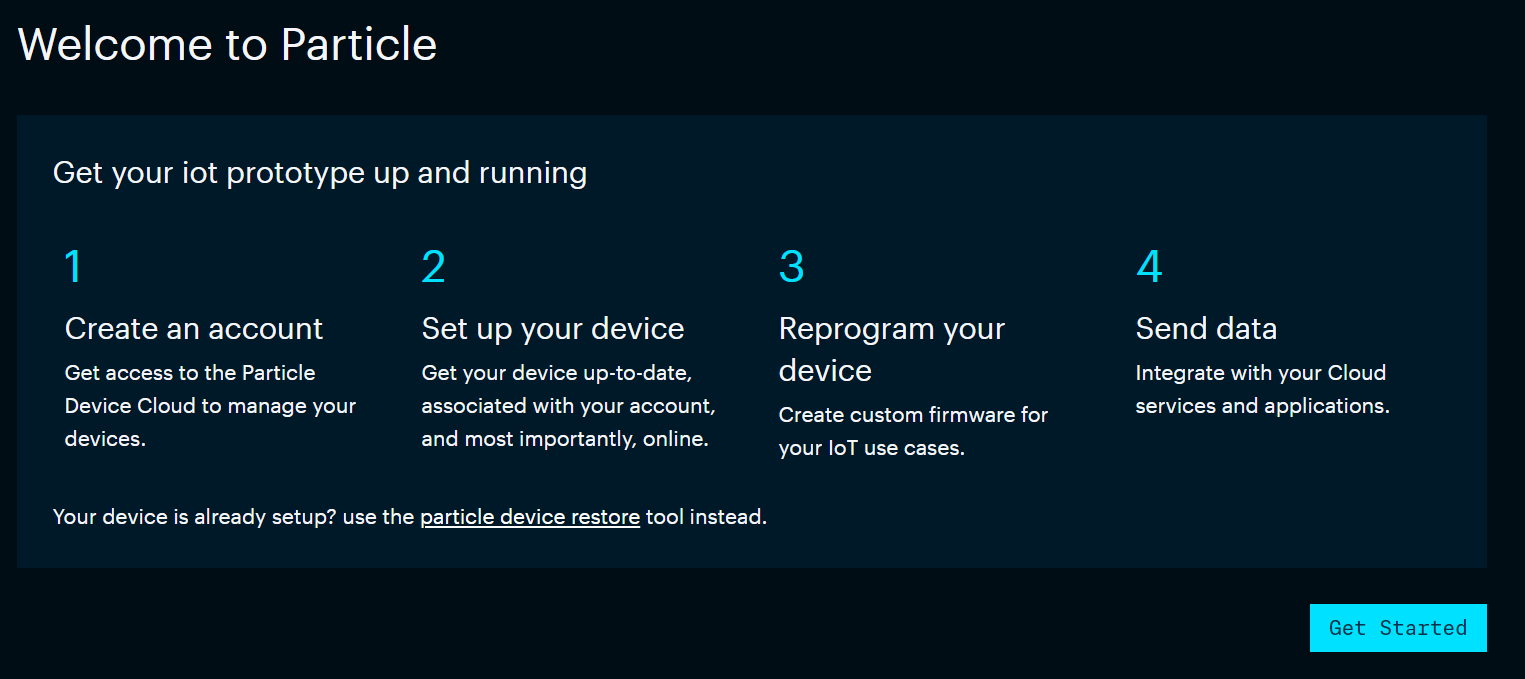

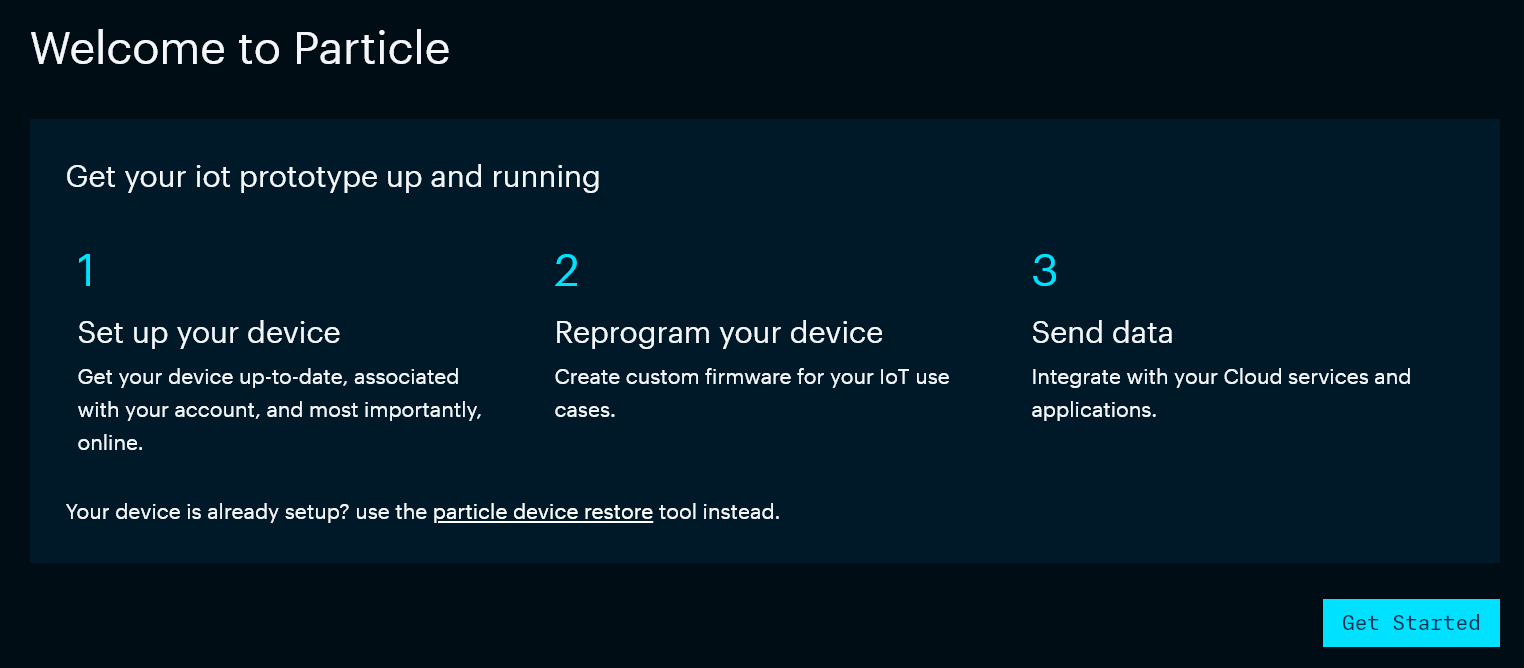
Setup Your Device
Continue with setup in your web browser
-
Click Continue to device setup

-
Go to Get Started
-
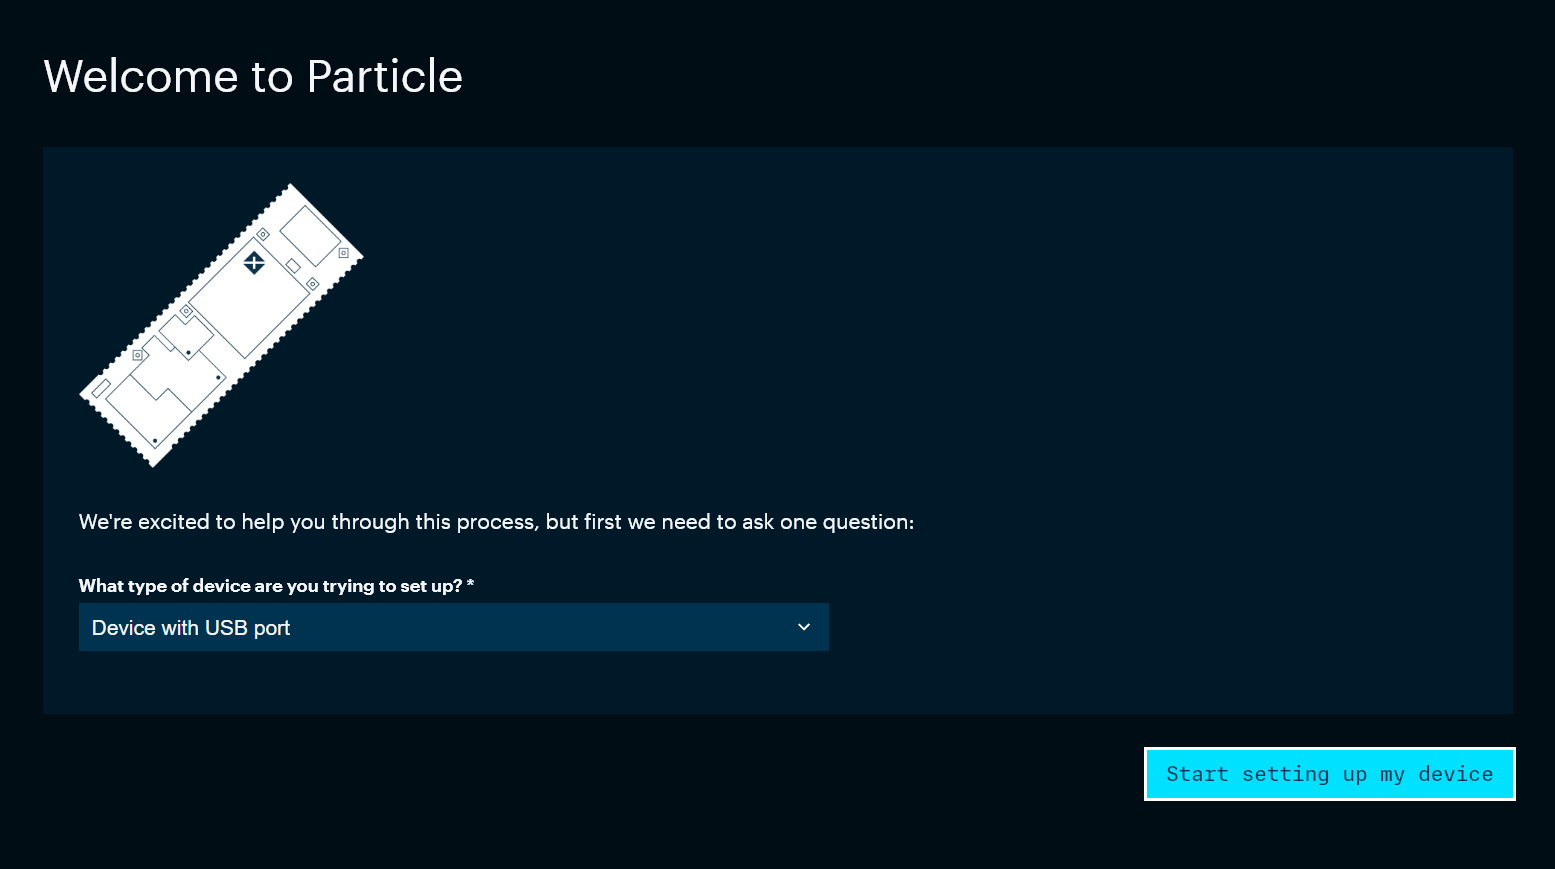
Choose Device with USB Port
-
Continue with the four step process to configure your device via USB. This process will take few minutes. As the Photon 2 updates, it will blink different colors.
-
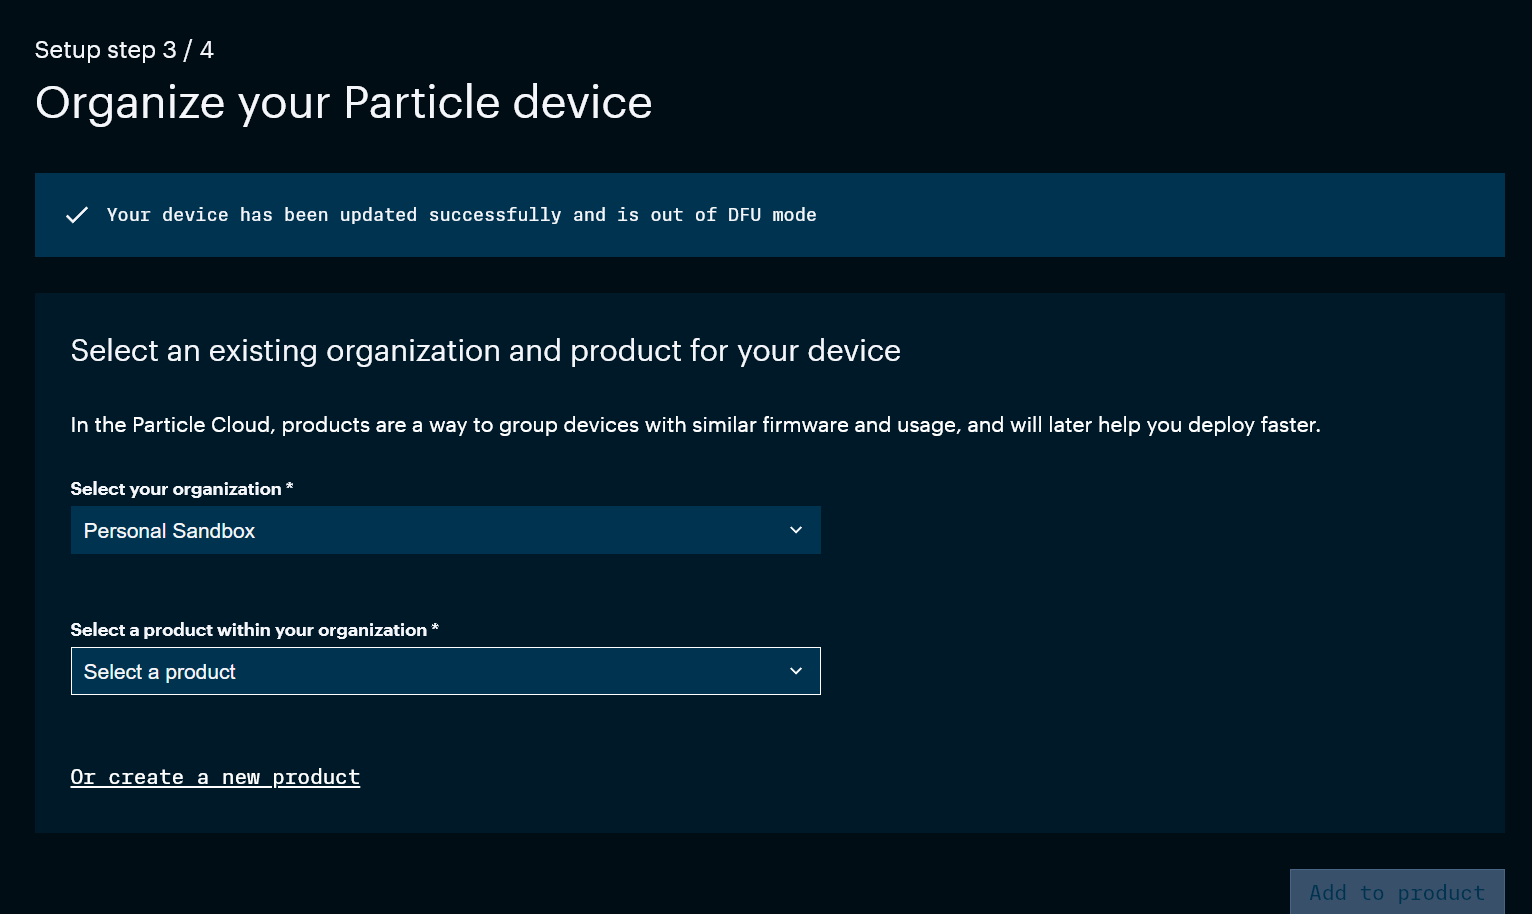
When you get to the following screen that says Organize your Particle Device, choose or Create a New Product
-
For product name, type itp_348 and click Create new product
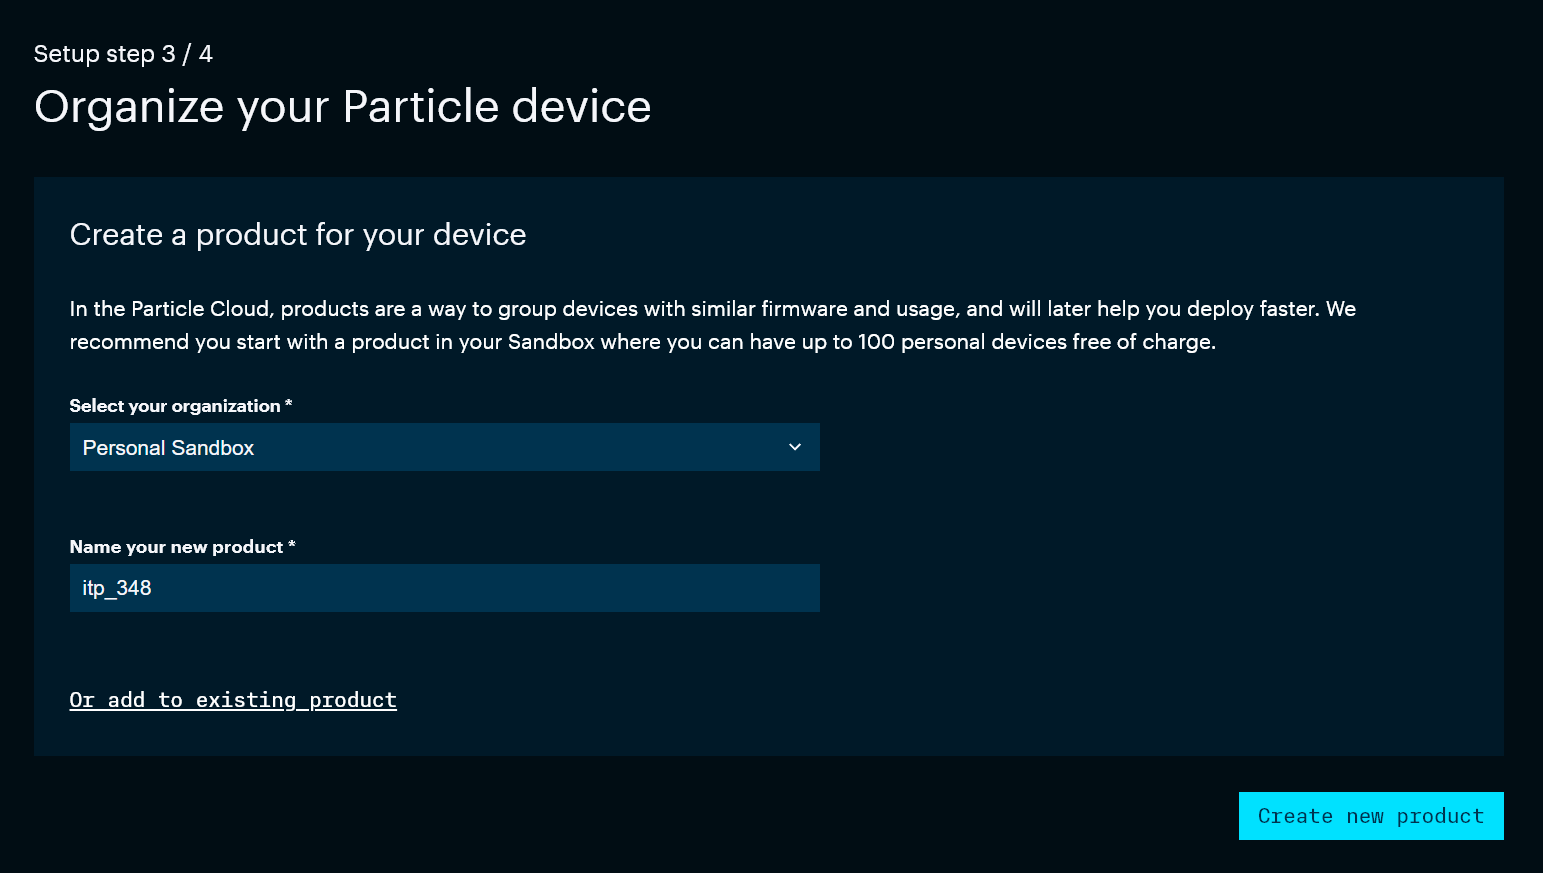
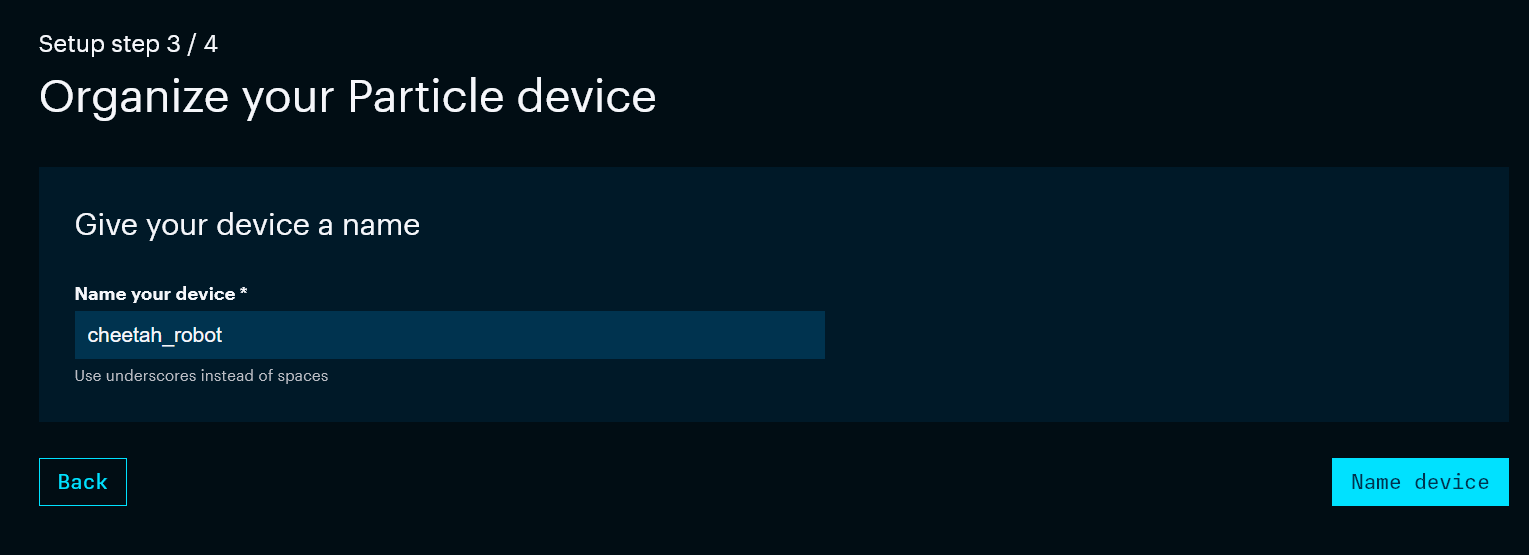
-
For device name, you can use the default name, or create something unique, just make sure the name has only letters, numbers, and underscore (no spaces or special symbols)
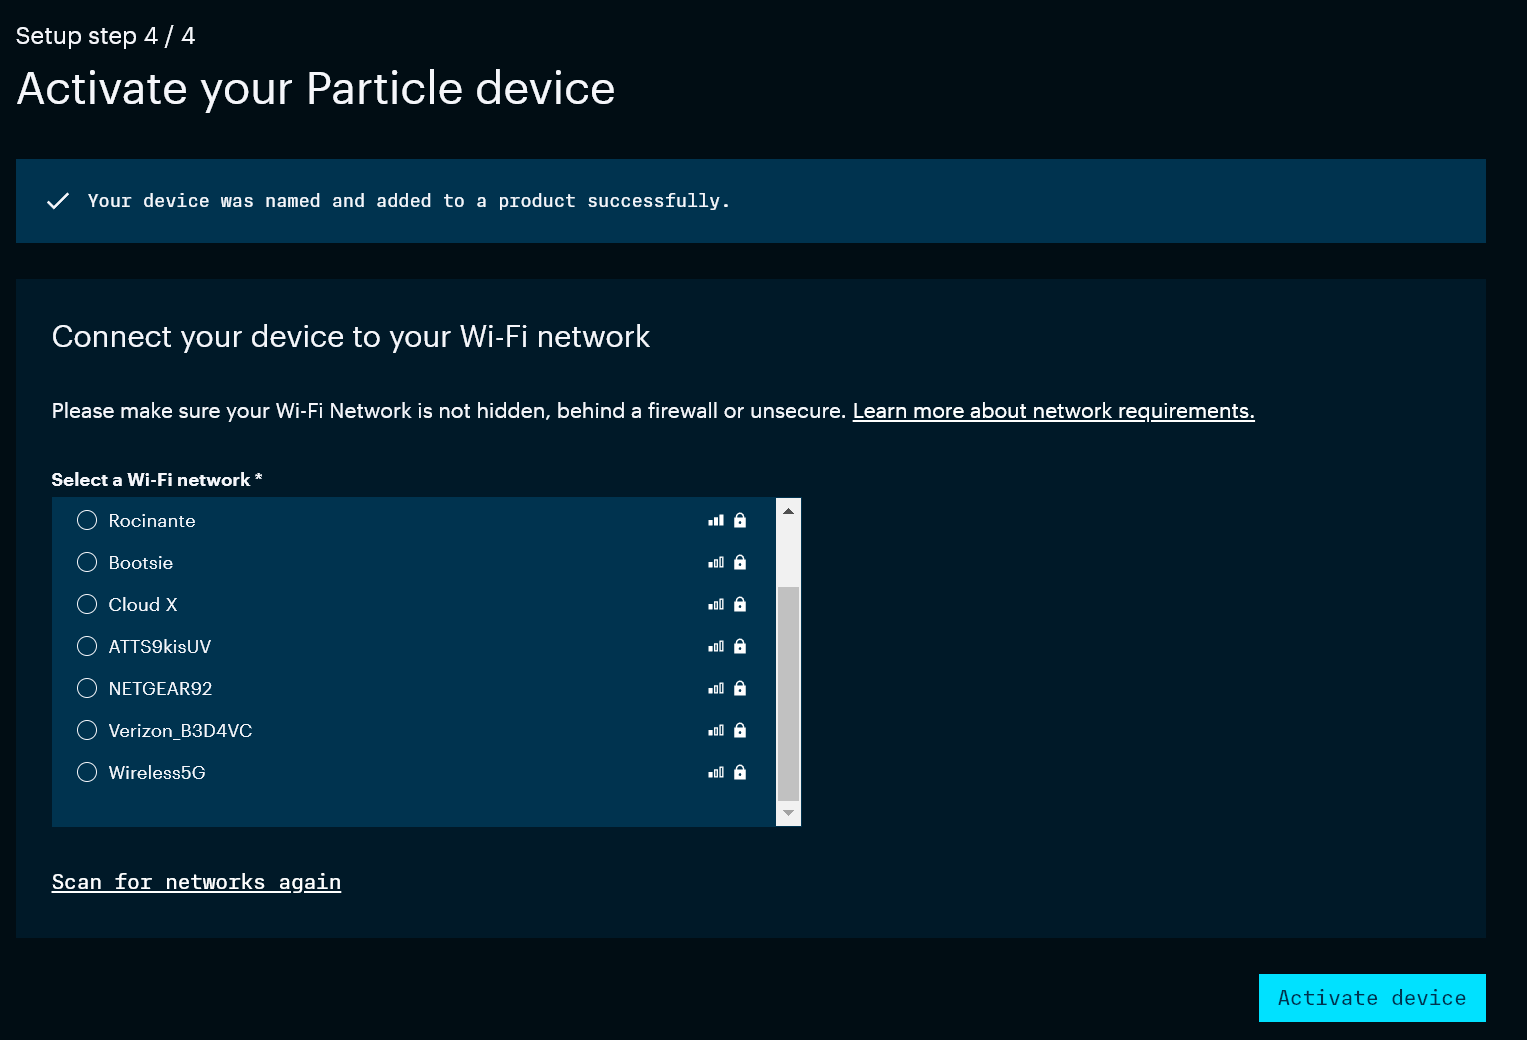
-
Choose your Wifi network. If you are on campus, use USC Guest Wireless, and leave the password blank. If it doesn’t connect to Wifi on the first try, it often works if you try it again.
- If you are off-campus and need to login to a website before you can connect to Wifi, you will need to do a couple things before you can get the Photon 2 online. You can follow these instructions or reach out to course staff for assistance.
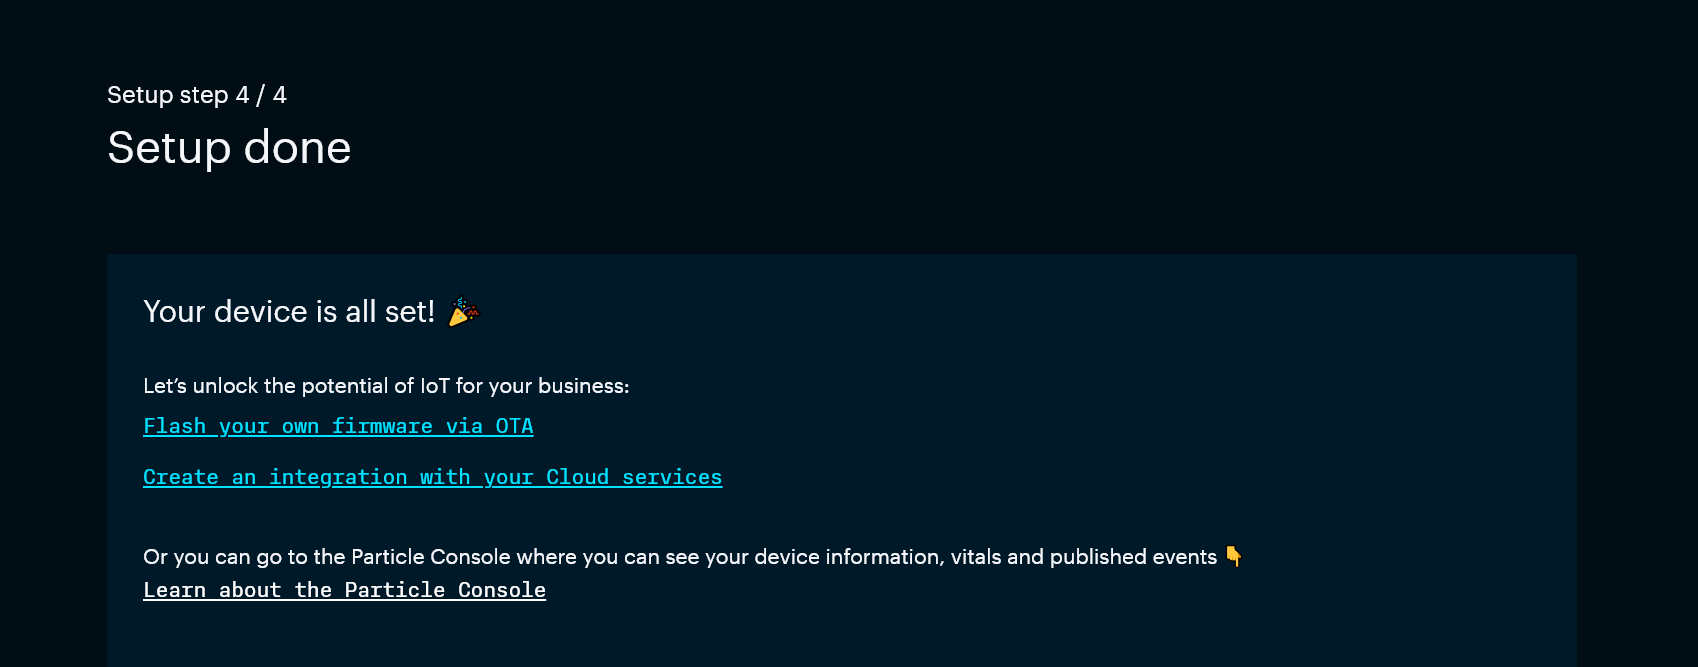
- When you see this success page, you can close your browser
Install Particle Workbench
Workbench is the IDE we will use to write firmware code as well as to install it on the device
-
Open Chrome and visit the site: https://www.particle.io/workbench/
-
Download and install Particle Workbench
Install Fritzing
Fritzing is a program to create visual layouts of device projects.
-
ITP has paid for a Fritzing support license for the class. To download it, please go to the course Brightspace site and click on “Fritzing Download”.
-
Download and install Fritzing, and then continue these instructions
Install Fritzing Library for Additional Parts
There are additional we will used in class that we need Fritzing parts for.
-
Download the library for Fritzing:
https://github.com/reparke/Fritzing_Collection/archive/main.zip
-
Unzip the file (take note of the folder location)
-
Open Fritzing
-
On Parts panel on the right side of the screen, click the small dropdown menu and choose Import…
-
Navigate to the folder with the file you downloaded and open
ITP_348_Parts.fzpz -
Click the small dropdown menu on the Parts panel again and chose Save Bin
Deliverables
- There is nothing to submit for this assignment.