Creating IoT Mobile Apps with Blynk
Blynk Overview
What is Blynk?
- Blynk is a “low code” platform for interacting with IoT products
- “No code” drag-and-drop, visual tool to build mobile apps
- Mobile apps can interact with, receive data from, and control IoT devices
- You can develop add your own branding and package the app with your IoT device
Blynk Functionality
- Data storage
- Display real-time sensor data and historical data
- Control IoT device from app
- Email / push notification when device is offline
- Custom webhooks
Blynk Evaluation
| Advantages | Disadvantages |
|---|---|
| Highly customizable | Free version has limitations |
| Easier to integrate than other mobile dashboards (e.g. Losant) | Dashboard is limited (compared to Initial State) |
| Easy to design mobile app without coding | Requires modifying loop() logic |
Quick Blynk Definitions
- Template: store configuration settings for your project; need to create a new template for each project
- Device: represents your Photon 2
- Datastream: channels that send data between the device and Blynk; each variable you send needs separate datastream
- Virtual Pins
Virtual Pins
- Use virtual pins to send and receive data from Photon 2
- These are not real hardware pins, but just a concept used by Blynk
- Virtual pins support
intsandStrings(unlike hardware pins) - 32-128 pins are supported (label
V0,V1, etc.) - Note: You can not use
const intto define virtual pins. If you want to define pin label, use#define VPIN_LED V2syntax
Blynk Integation
Three Phases to Integrate Blynk
There are three places we need to configure to use Blynk
- Blynk Cloud website (https://blynk.cloud) This is where we configure the data that will be sent
- Workbench This is where we write the Photon 2 code to send data
- Blynk mobile app This is where we will design the interface
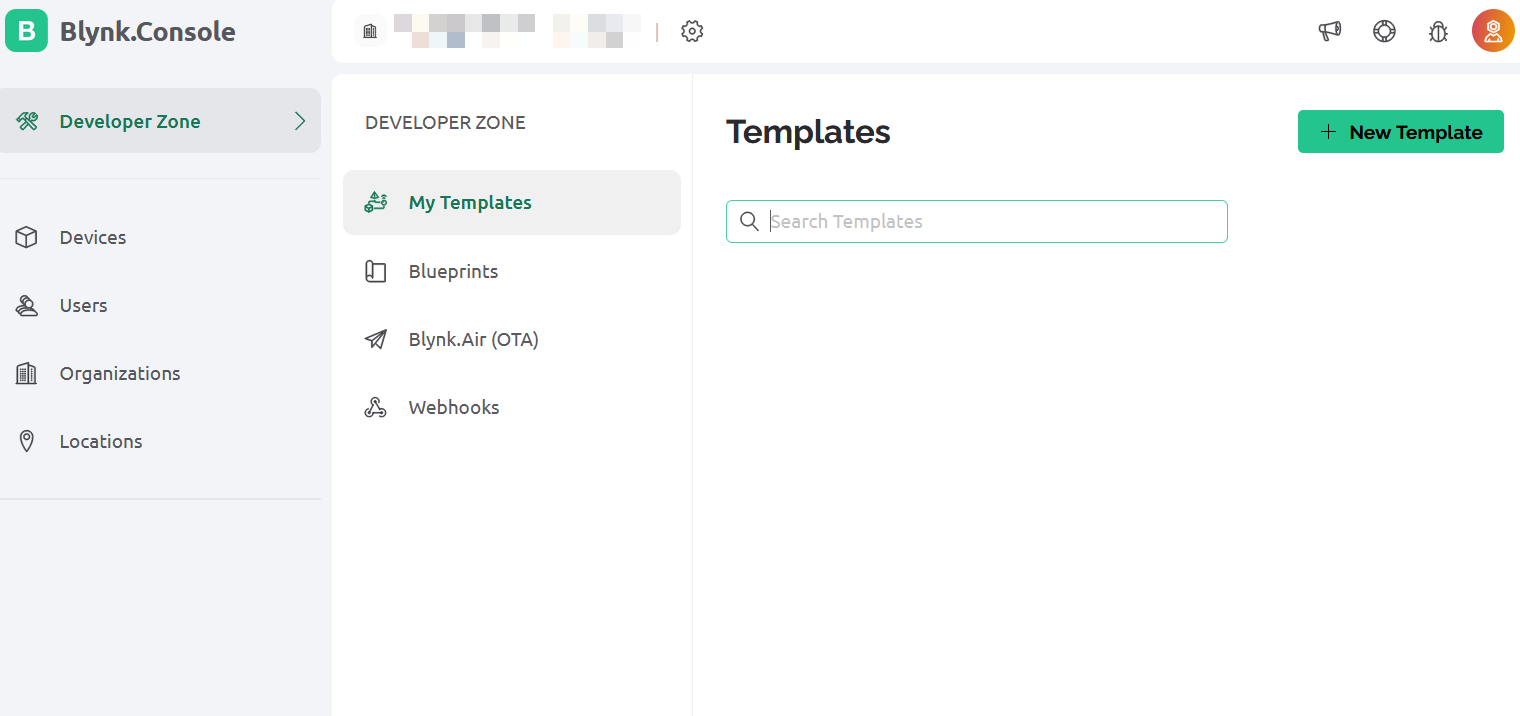
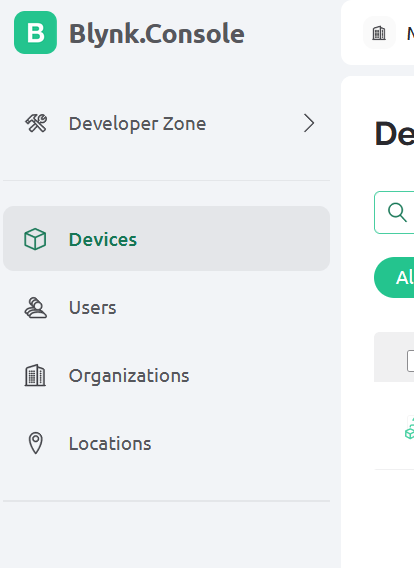
Integration Phase 1: Blynk Cloud
Blynk Cloud website (https://blynk.cloud)
- Create template (new template for every new project)
- Create datastreams (one for each piece of data to be sent to cloud)
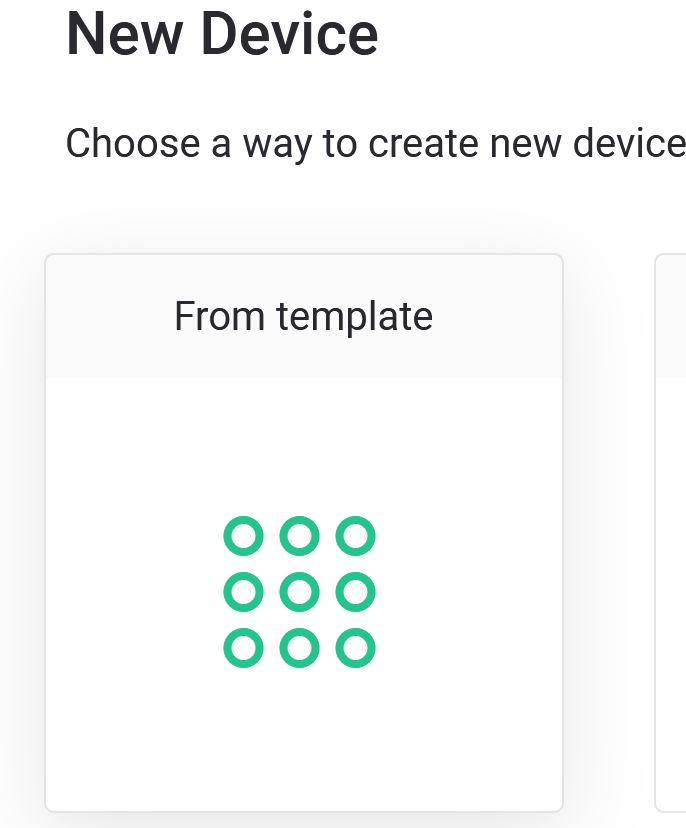
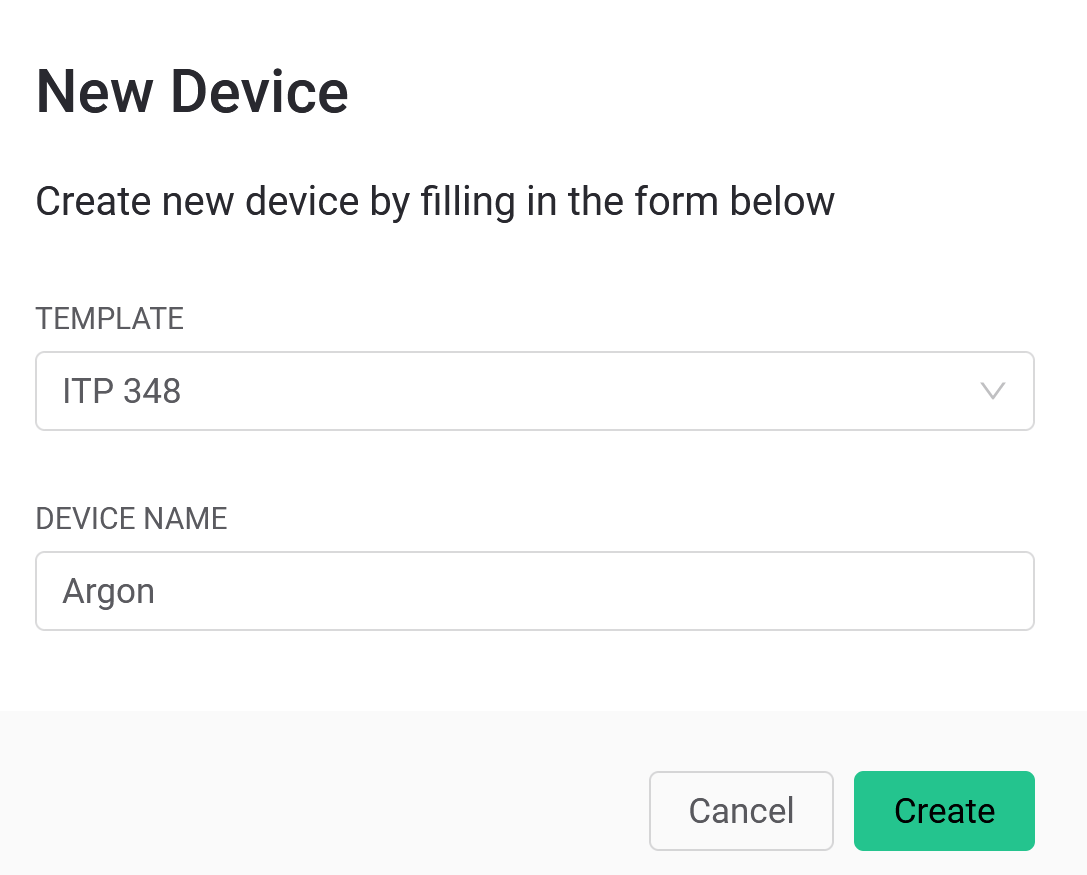
- Create device (this represents your Photon 2)
- Copy config info / key into Workbench Sketch
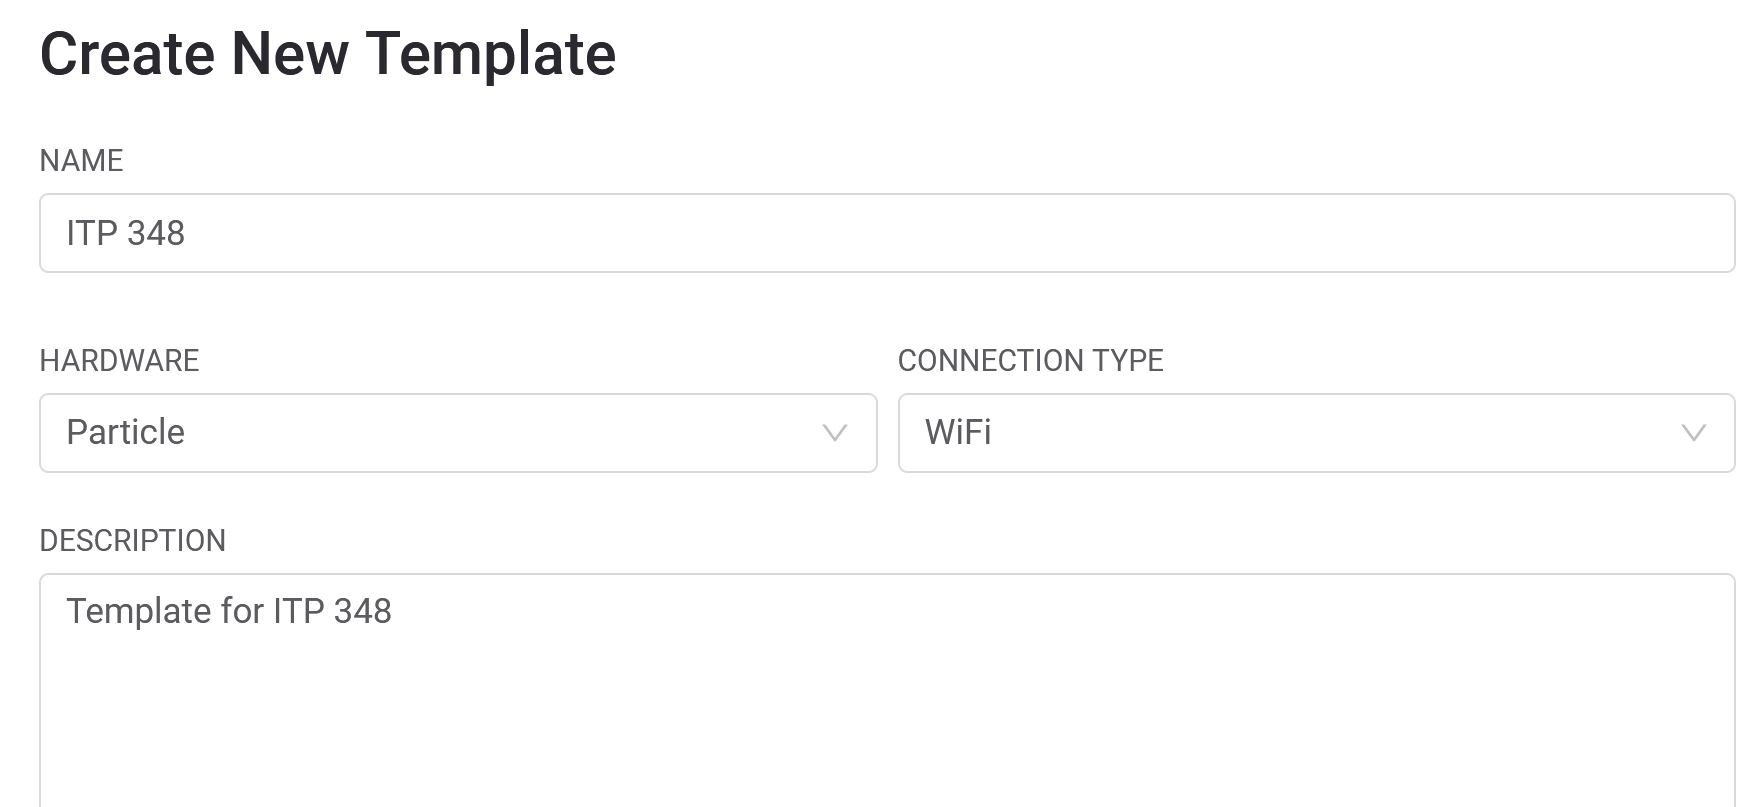
Integration Phase 1: Create template
Integration Phase 1: Create datastreams
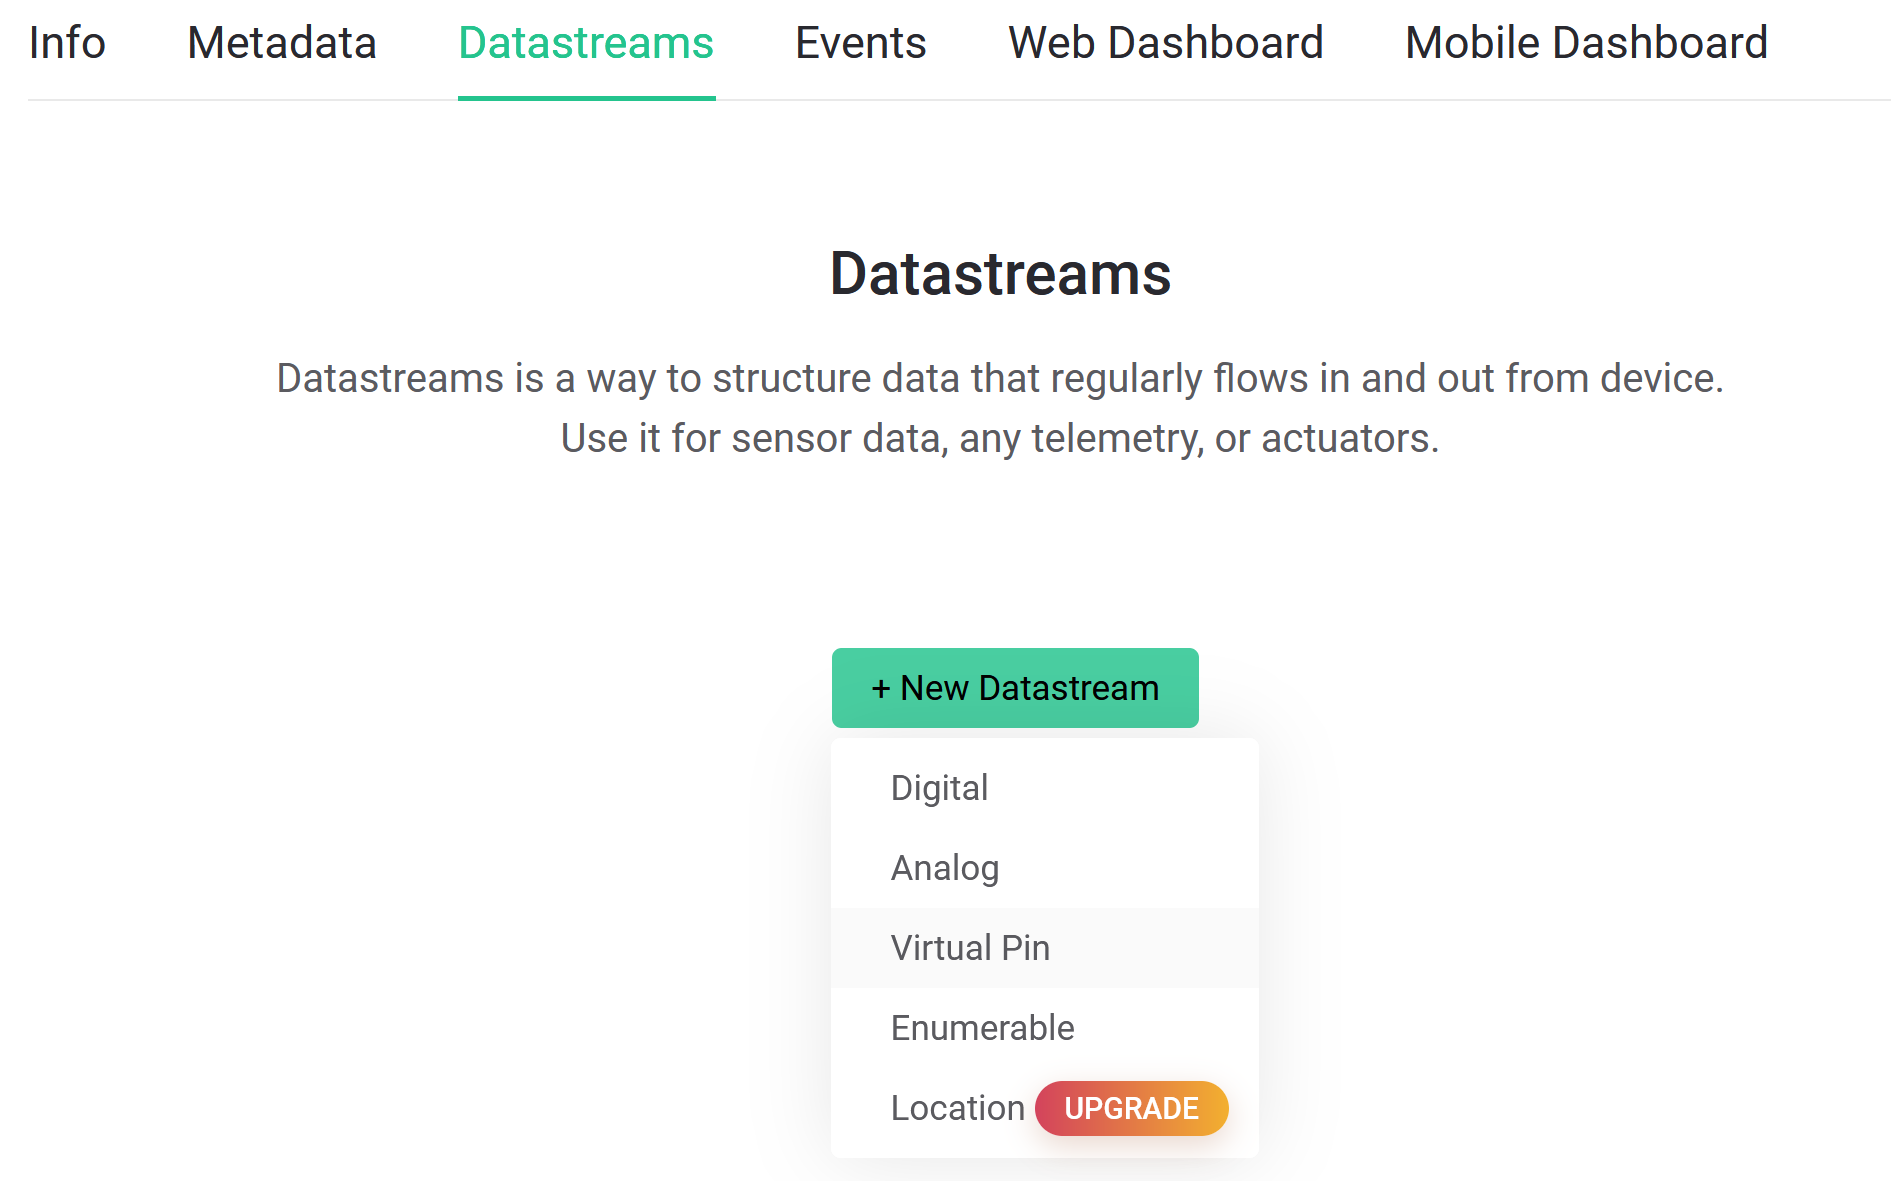
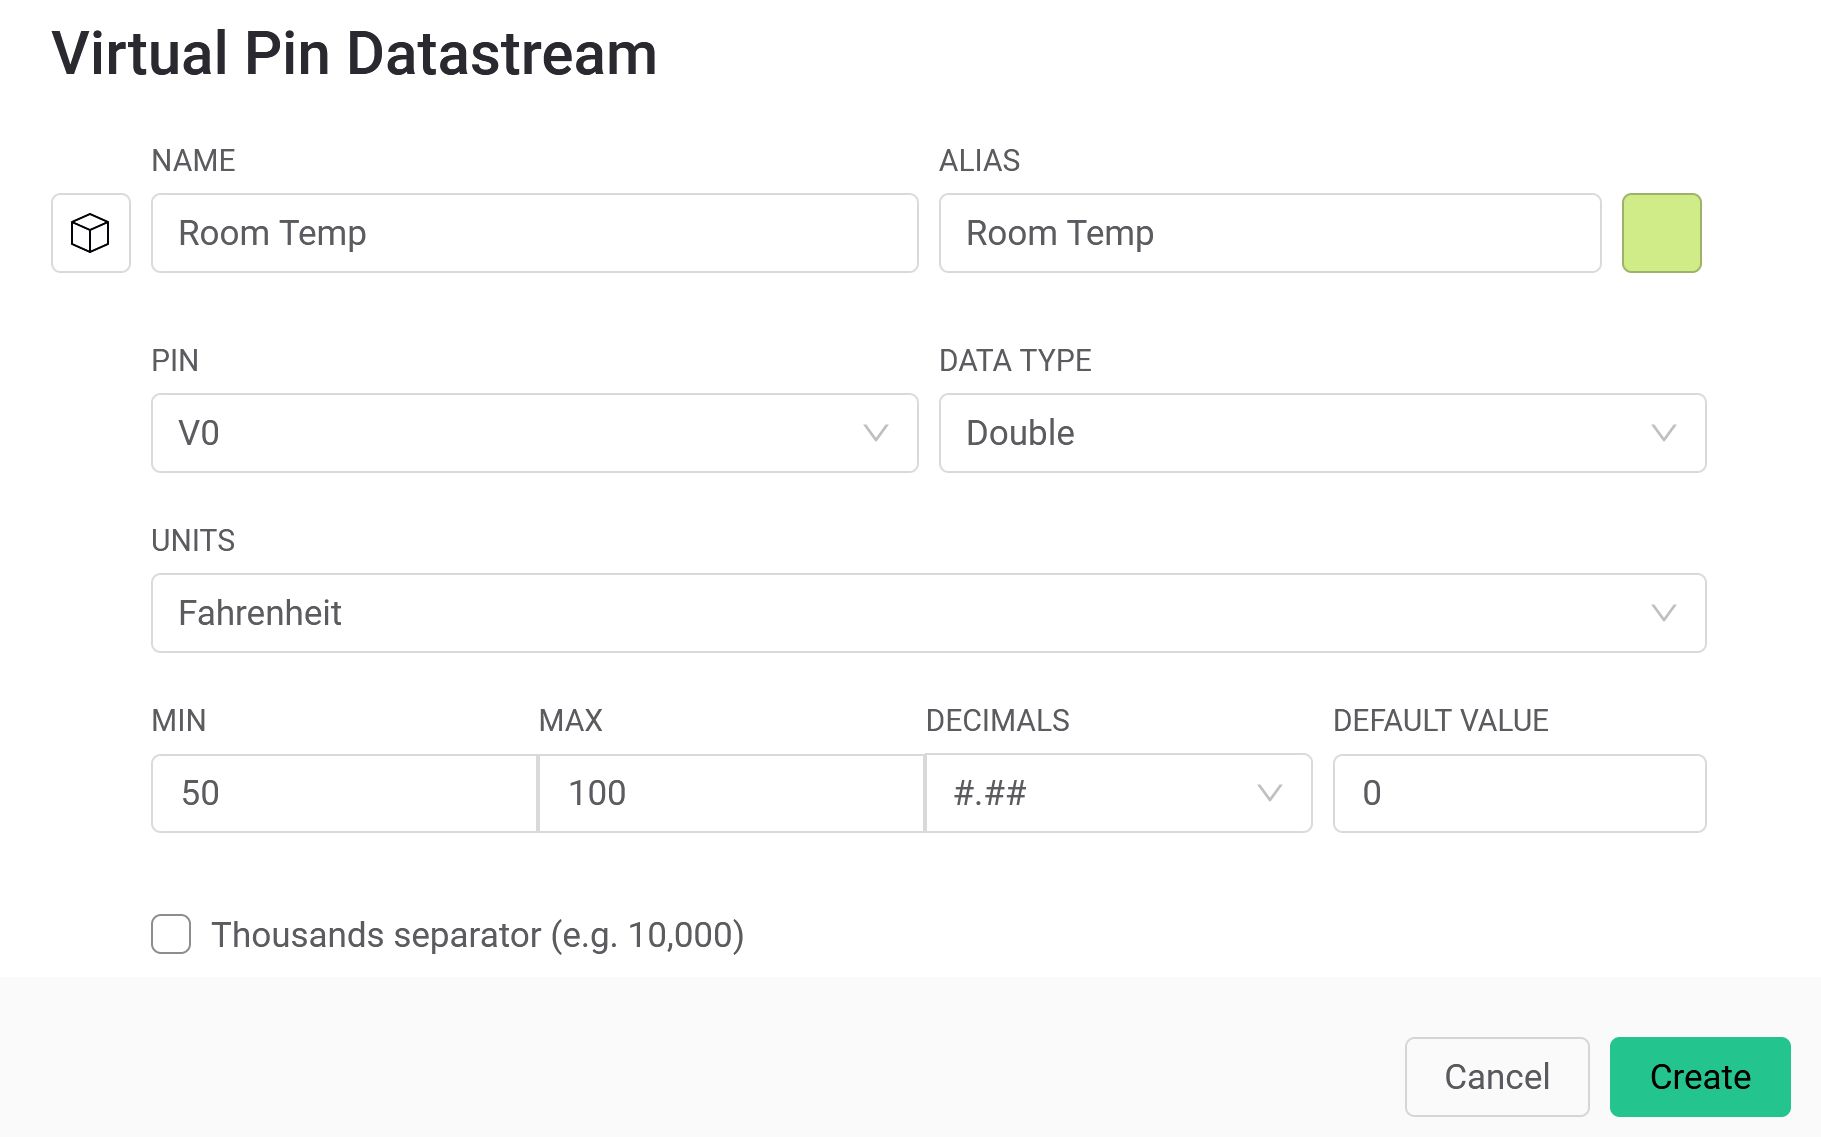
Click Save
Integration Phase 1: Create new device
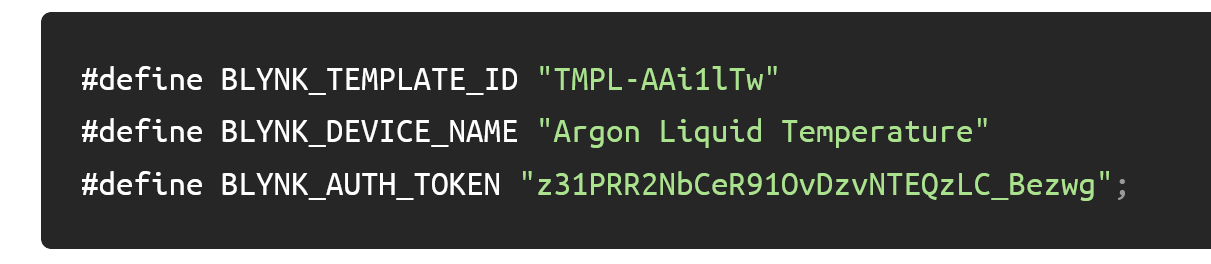
Integration Phase 1: Configuration Info / Key
Copy this info to include in sketch below (Note: this is just an example–use the unique values for your template)
Integration Phase 2: Workbench
- Create new sketch
- Install
blynklibrary - Modify sketch with Blynk configuration
- Add your unique custom info / keys from Blynk Cloud
Integration Phase 2: Modify sketch with Blynk configuration
- Copy the lines from the template to the top of your sketch:
#define BLYNK_TEMPLATE_ID "ADD_YOUR_OWN"
#define BLYNK_DEVICE_NAME "ADD_YOUR_OWN"
#define BLYNK_AUTH_TOKEN "ADD_YOUR_OWN"
- Also add these lines beneath the template lines:
#include <blynk.h>
- Add these line to the end of
setup()
delay(5000);
Blynk.begin(BLYNK_AUTH_TOKEN);
- Add this line to the top of
loop()
Blynk.run();
After integration, your code should look something like the following
#include "Particle.h"
SYSTEM_MODE(AUTOMATIC);
SYSTEM_THREAD(ENABLED);
SerialLogHandler logHandler(LOG_LEVEL_WARN);

#define BLYNK_TEMPLATE_ID "ADD_YOUR_OWN"
#define BLYNK_DEVICE_NAME "ADD_YOUR_OWN"
#define BLYNK_AUTH_TOKEN "ADD_YOUR_OWN"

#include <blynk.h>

void setup() {
  delay(5000);
  Blynk.begin(BLYNK_AUTH_TOKEN);
}

void loop() {
  Blynk.run();
}
Integration Phase 3: Blynk App
- Install Blynk app on your phone
- Build interface in Blynk app
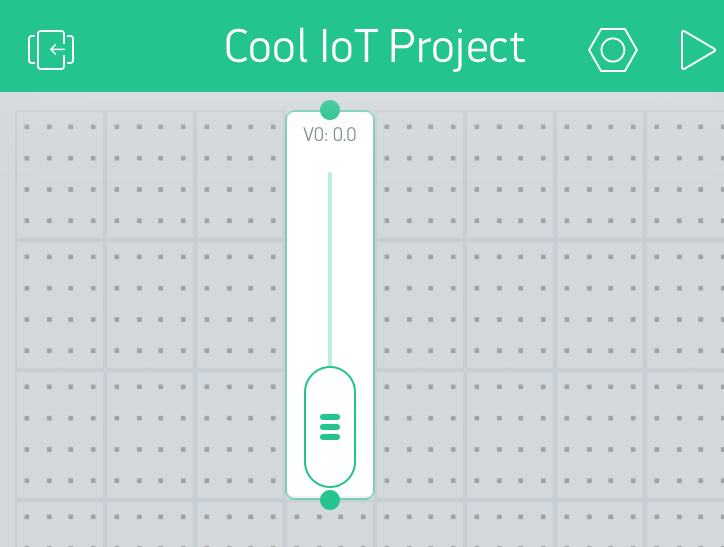
Building Blynk Projects
Important notes about loop()
-
Do not use
delay()inloop()or it will interfere with cloud connection -
Instead, use a
millis()or a timer to send data to app (limit to 10 values per second)
App: Send data from Blynk App to Photon 2
Syntax: Send data from Blynk App to Photon 2
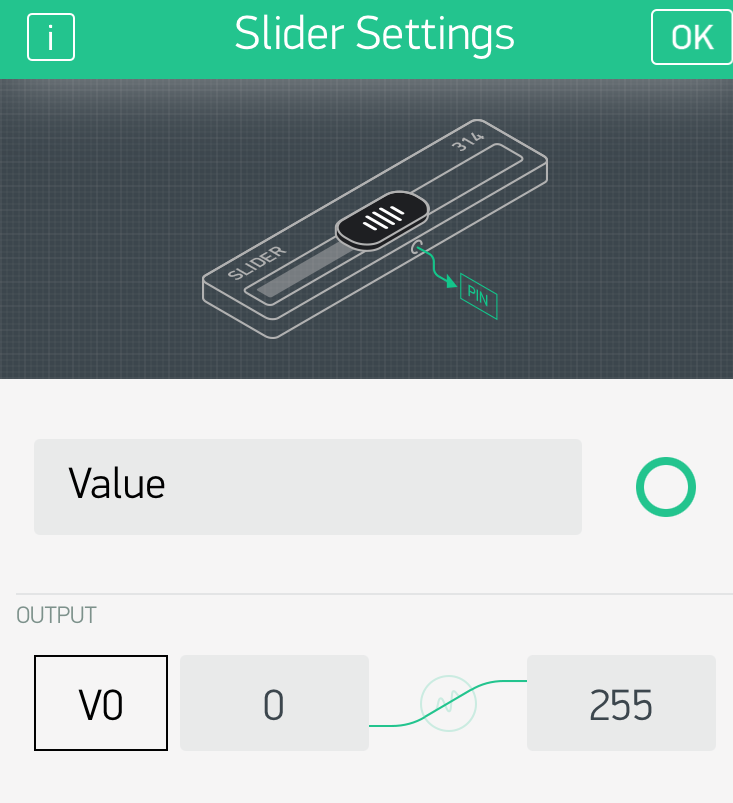
- To send data FROM app TO Photon 2, create a
BLYNK_WRITE(vPin)function - This event handler will be called automatically when the app changes
BLYNK_WRITE(<<VIRTUAL_PIN>>){
    //code
}
Example: Send data from Blynk App to Photon 2
BLYNK_WRITE(V0){
  //assign incoming value from pin V0 to a variable
  int pinValue = param.asInt(); //or param.asStr() or .asDouble()
  Serial.println("V0 Slider value is: " + String(pinValue));
}
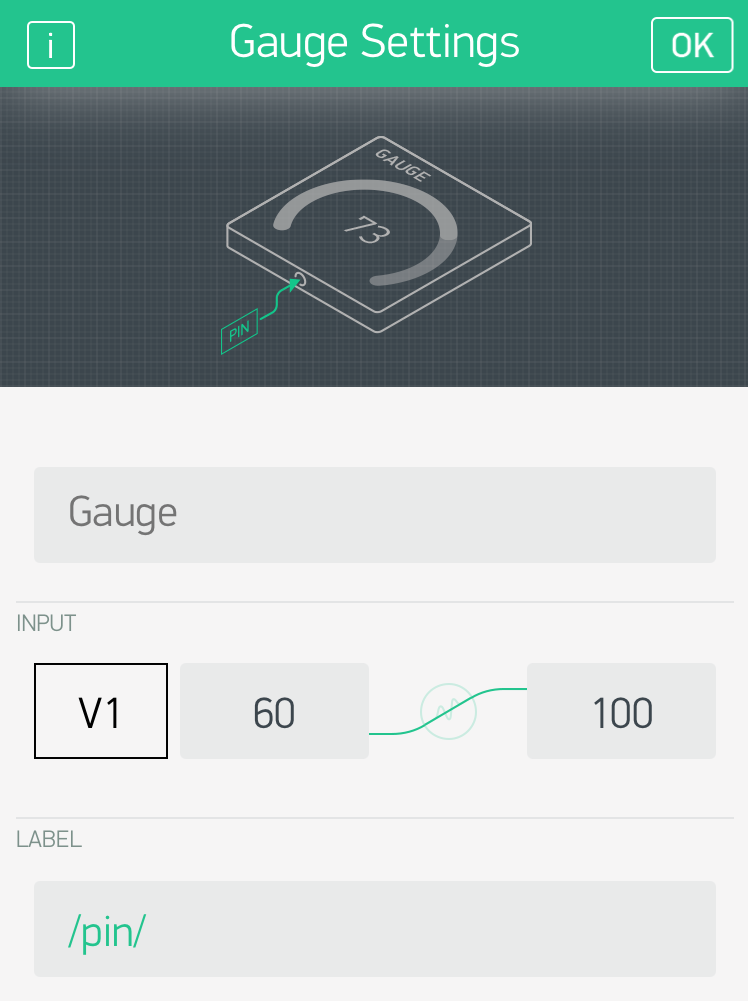
Syntax: Send data from Photon 2 to Blynk App
- To send data from Photon 2 to Blynk App, use
Blynk.virtualWrite(<<PIN>>, <<VALUE>>);
Example: Send data from Photon 2 to Blynk App
unsigned long blynkDelay = 10000; //change this as needed

void loop() {
  unsigned long curMillis = millis();
  if (curMillis - prevMillis > blynkDelay) {
    double tempF = ...; //read a sensor
    Blynk.virtualWrite(V1, tempFermF);
    prevMillis = curMillis;
  }

  Blynk.run();
}
App: Send data from Photon 2 to Blynk App
Wiring for Exercise and Lab

Exercise
- Connect RGB led and magnetic switch
- Install Blynk app on your phone
- Create Blynk template
-
Create Blynk datastream
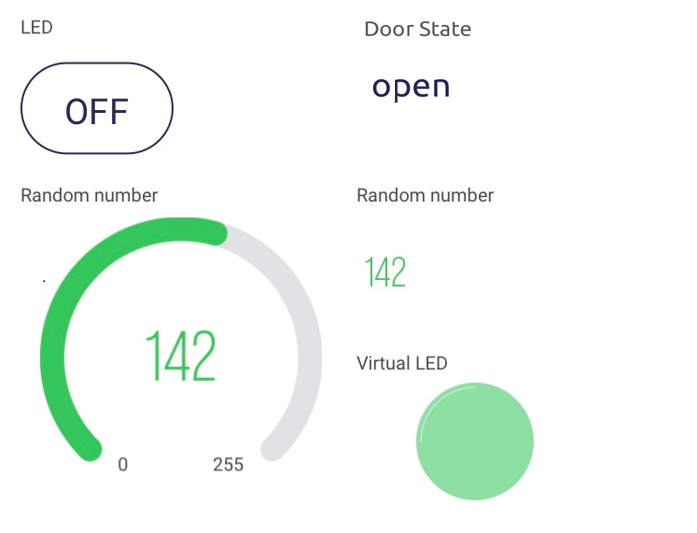
Datastream Name Virtual Pin Button Show LightV5Random NumberV6Door StateV3 -
Build Blynk with the following features
- Use a display to show if magnetic switch is
openorclosedon pinV3(Photon 2 –> app) - Send random number (0-255) to app and display on pin
V6(Photon 2 –> app) - Use virtual LED to show random number on pin
V6(Photon 2 –> app) - Use a gauge to show random number on pin
V6(Photon 2 –> app) - Use button to control turn the RGB led to white via pin
V5(app –> Photon 2)
- Use a display to show if magnetic switch is
Exercise App Layout
Lab
-
Work in teams and create the following functionality in Blynk app
-
Create a new template and device in Blynk Cloud
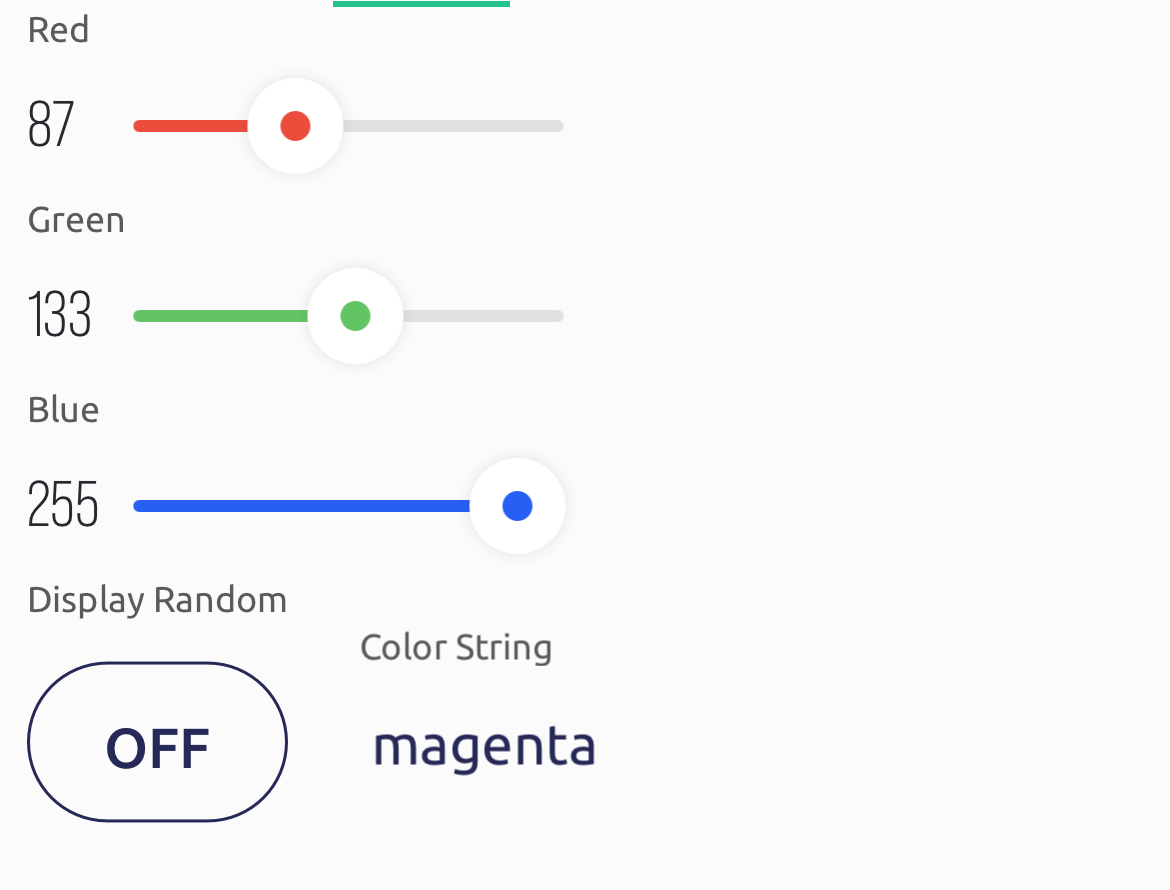
Datastream Virtual Pin RGB RedV0RGB GreenV1RGB BlueV2Button Display Random ColorV4Displayed Color StringV7- Use three sliders to control RGB LED on pins
V0 V1 V2(app –> Photon 2) - Use a button on
V4to trigger the RGB LED to display a color randomly chosen from white, yellow, magenta, or red (app –> Photon 2) - When one of the four random colors is displayed on the RGB LED, send a string representing that color to the app on pin
V7(Photon 2 –> app)
- Use three sliders to control RGB LED on pins
-
What happens if you put
Blynk.syncAll();at the end ofsetup()?
Lab App Layout
Resources
Credit
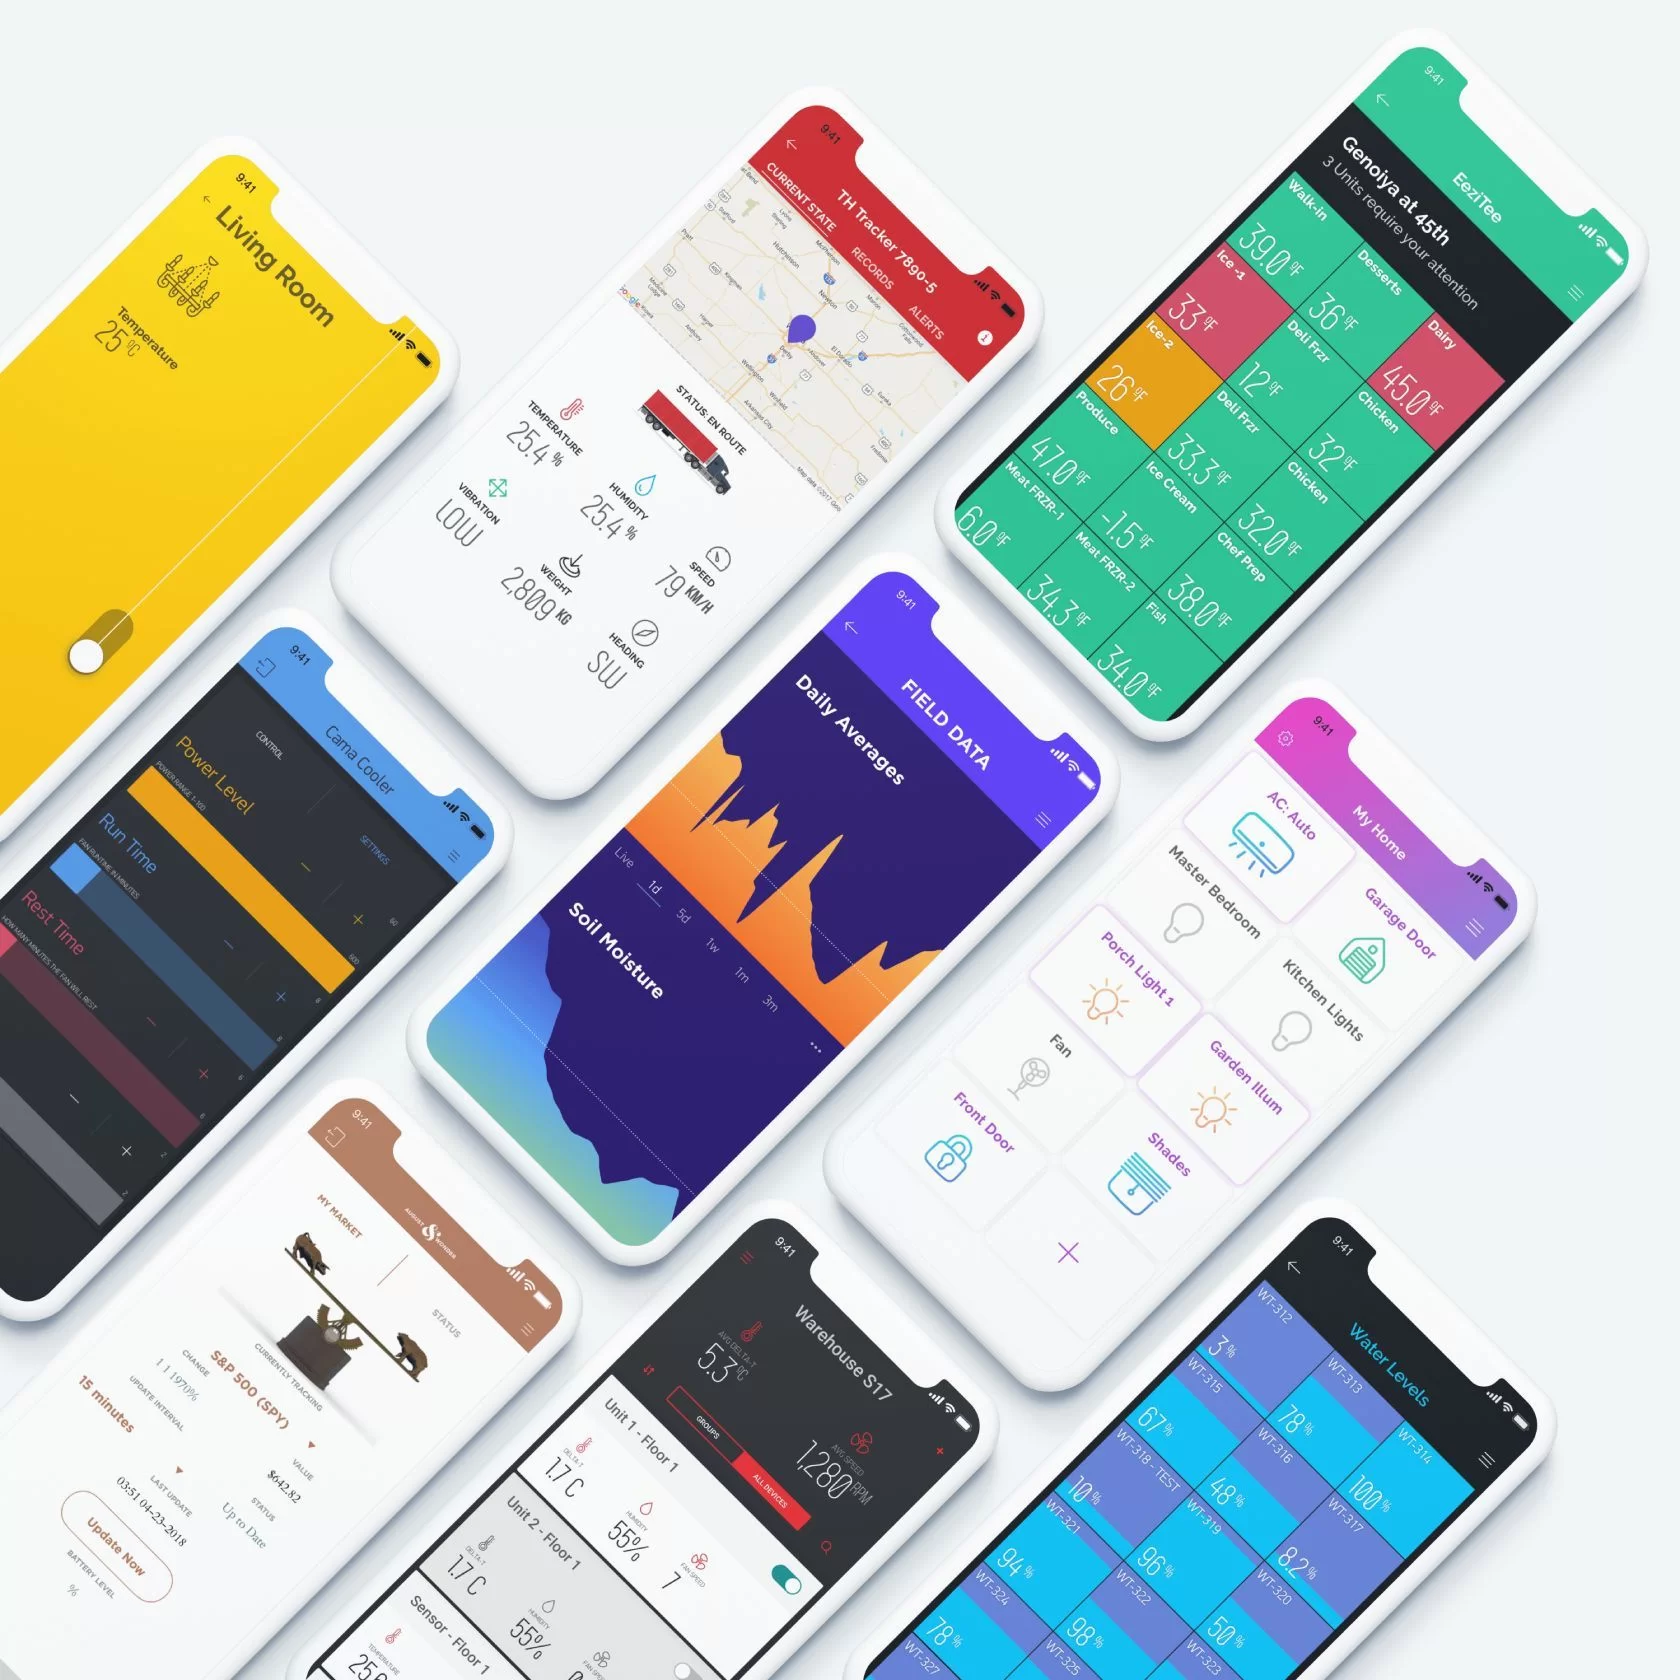
- Image from Blynk