Photon 2 Microcontroller
Photon 2 Microcontroller
Microcontroller
- Microcontrollers (MCU) are embedded computers
- They are often designed for a specific purpose (e.g. microwave, RC car, TV remote)
- Microcontrollers can take input, process it, store a value, and produce output (like on your computer)
- Unlike your computer (or even your phone), a microcontroller has very limited processing power and storage
- Ex: The newer smartphones have 100,000 times more storage than the Photon 2
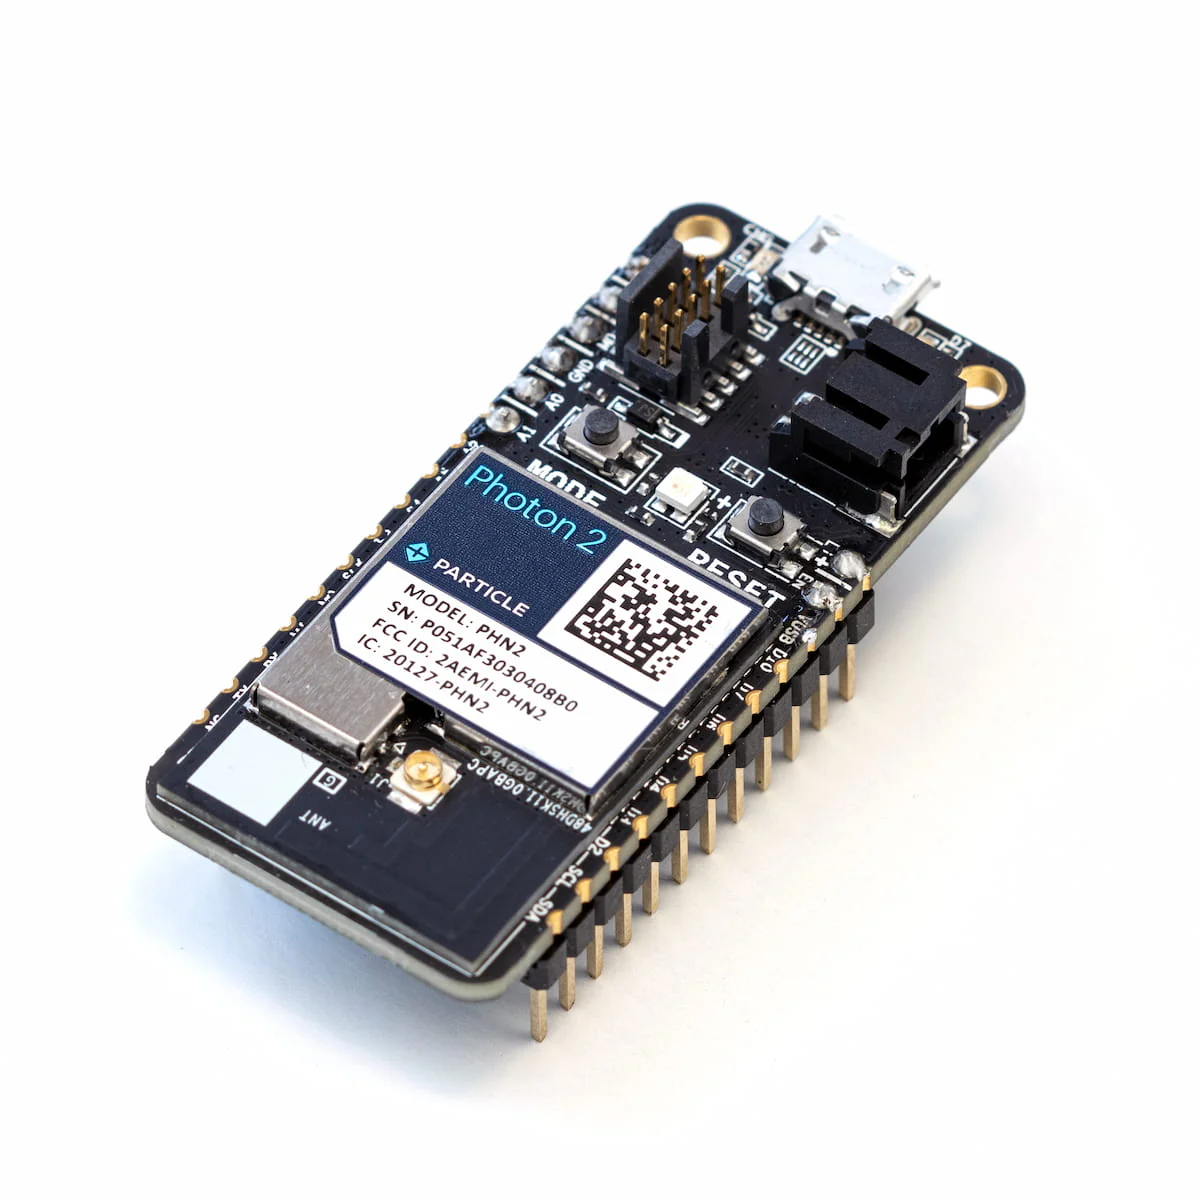
Particle Photon 2
- We will develop projects for a microcontroller called an Photon 2 made by Particle
- The Photon 2 is able to wirelessly connect to the internet and to Bluetooth
- Particle also has a cloud communication system we will explore later in the semester
Datasheet
- One important skill of building smart devices is learning to understand a datasheet
- A datasheet explains how a component functions, how to use it, what conditions it will operate, etc.
-
Don’t worry about understanding everything in a datasheet, but learn to pull out key information
- Photon 2 Datasheet
Work in groups and answer the following
- What voltage does the Photon 2 operate at?
- Which IC (integrated circuit) is the “main” processor?
- Which IC controls the Wifi module?
- What is the difference between pins
3v3andVUSB? - How many digital input pins are there?
- How many analog output pins are there?
- How many ground pins are there?
- What is the voltage that the input pins can handle?
- Can we power the Photon 2 with battery?
Datasheet
Structure of Photon 2 Programs
- We will use Particle Workbench as our IDE
- We will write software code that runs on the Photon 2
- Programs that run on microcontrollers are called firmware
Important Note
- Your Photon 2 folder name cannot contain any spaces at all
C:\Users\Rob\ITP-348\Projectsis okc:\Users\Rob Parke\ITP 348\Cool Projectsis not
Key features
- Photon 2 programs are written in C++ (please see review link on course website for C++)
- Every Photon 2 program must have these two functions (you can other ones too)
void setup()void loop()
- In addition, most programs will also have
- global variable declarations
- library includes
Example program
#include "OLED_screen.h"	//library

const int MAX_PRESSES = 4;	//globcal constant
int numPresses = 0;			//global variable

void setup() {
  // put your setup code here, to run once:
}

void loop() {
  // put your main code here, to run repeatedly:
}
Note: There will be other default code at the top of the file when you create a new project. This code is needed to configure the Photon, but we can mostly ignore it
Libraries
#include "OLED_screen.h"
- Similar to
import - Allows us to access additional code and functions
- We will use this to communicate with certain devices like LCD screens
- Notice the
#
Variable Declaration
const int MAX_PRESSES = 4;	//globcal constant
int numPresses = 0;			//global variable
- Typically, many of our variables will be global (declared outside a function in the global namespace)
- In C++, every variable must explicitly declare it’s
setup() Function
void setup() {
  // put your setup code here, to run once:
}
- The
setup()function will only run once- Runs after each powerup or reset the Photon 2
- Use it to initialize variables, pin modes, start using libraries, etc.
loop() Function
void loop() {
  // put your main code here, to run repeatedly:
}
- After
setup()is called once, theloop()function is called endlessly- Basically an infinite loop
- Use it for the main functionality of your program