Servo Motors
Servo Motors
Goals
- Discuss servos
- Difference between servos and DC motors
- Implement a servos
- Combine DC motors and servos
Servo
- Short for “servomechanism”
- A servomotor is a type of servomechanism
- Uses feedback mechanism to precisely control the position or effect of a mechanical device
Servomotor Applications
- Hobby servos typically control angles
- Some servos are continuous and are essentially precisely controlled DC motors with a feedback mechanism
- Service range of typical servos are between 0 and 180 degrees
- However, rotating to the full range (0 and 180) can damage so often we use a smaller range such as 15-165
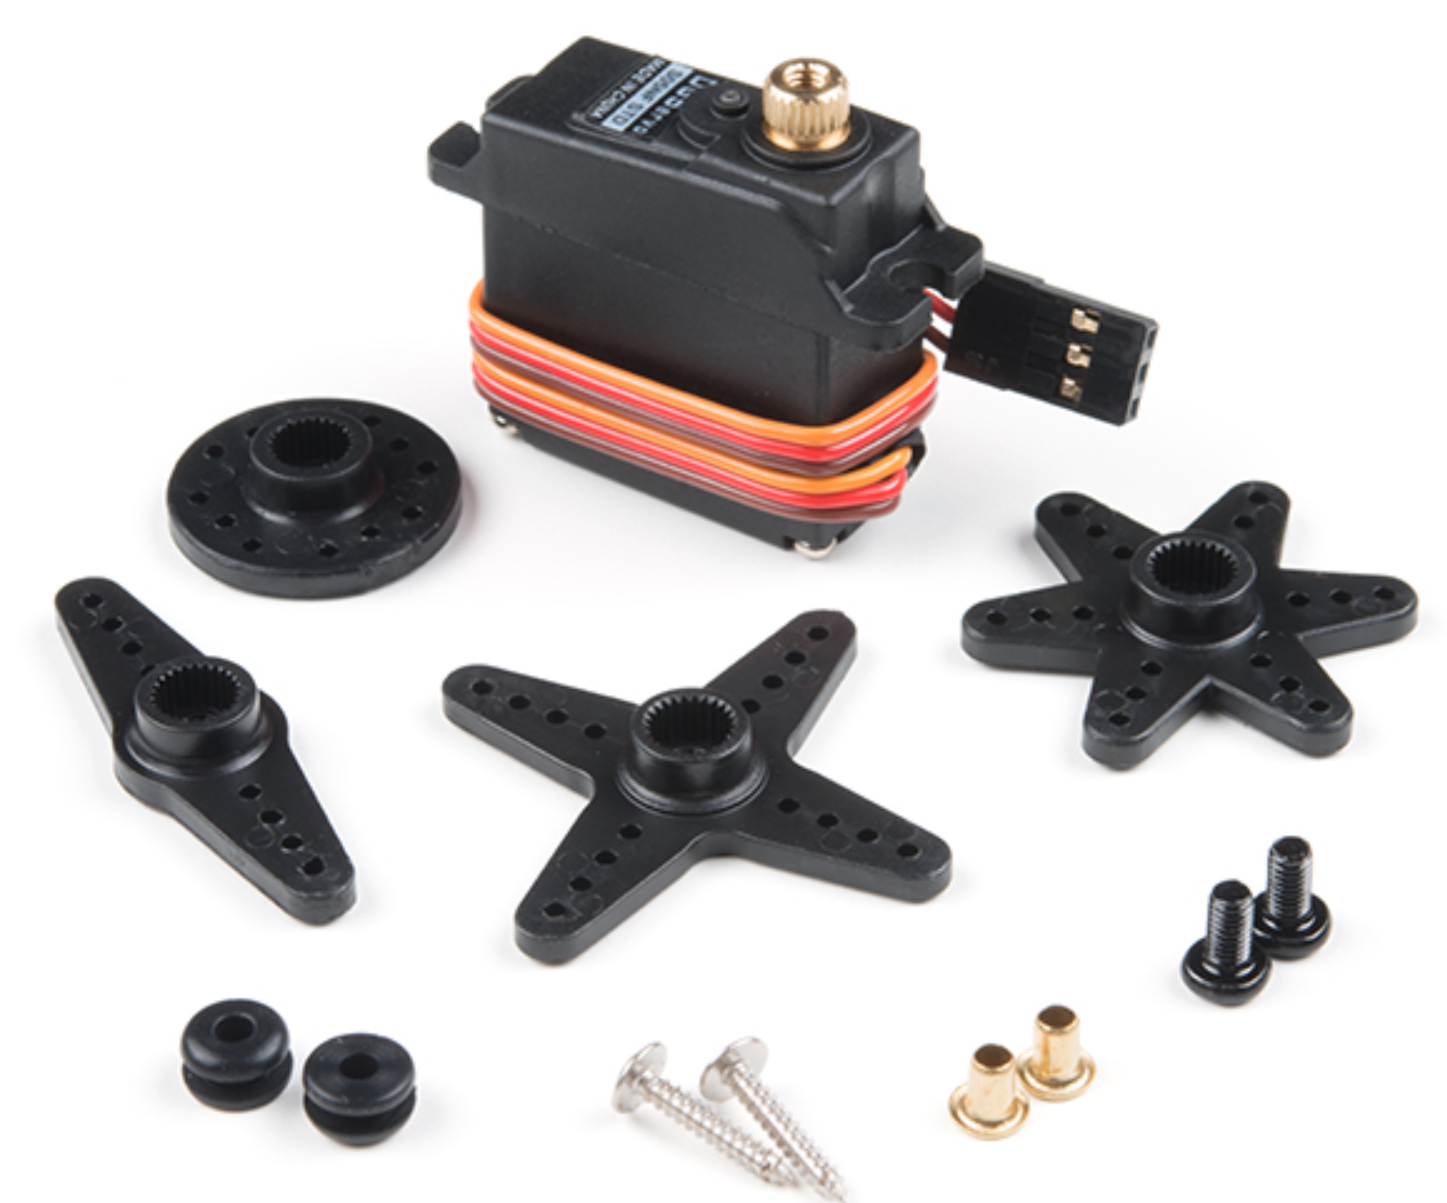
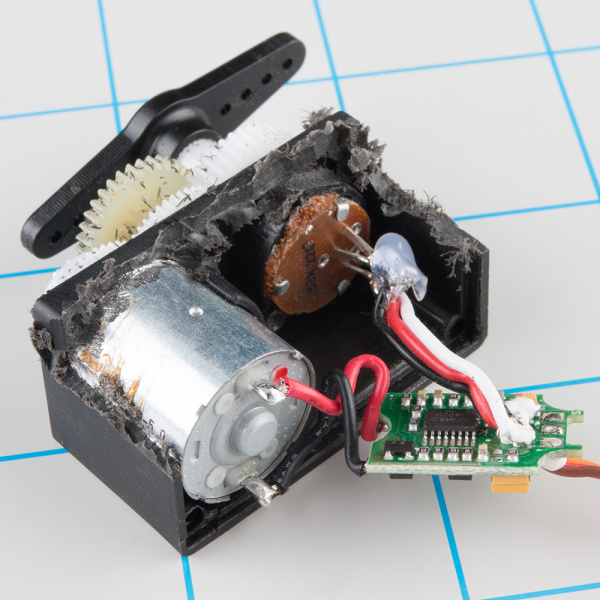
Inside Servo Motors
Quick Note on Wire Colors

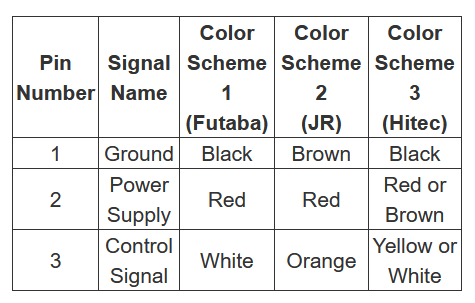
- The wiring colors vary with different servos so look carefully at your documentation
- Many servos will require 5V not 3.3V so use
VUSB
Wiring Diagram

Servo Class
-
The
servoclass is already part of the Particle OS, meaning we don’t need any special libraries to run it -
The
servoclass has a constructor for a Servo object and methods to interact with the servo
Servo Code
-
Create the Servo object
-
Attach the Servo object to a pin
-
Write to the Servo object
Servo Code - Creating the Servo Object
const int SERVO_PIN = D2;
//Create the servo object
Servo servoObj;
void setup(){
    //attach the servo object to the servo pin
    servoObj.attach(SERVO_PIN);
}
Servo Code - Turning the Physical Servo
void loop(){
    servoObj.write(15); //write the servo to position 15 degrees
    delay(1000); //wait one second
    servoObj.write(90); //write the servo to position 90 degrees
    delay(1000);
    servoObj.write(165); //write servo to position 165 degrees
    delay(1000);
}
Important Note about Servo Class
- The Photon 2 uses a single internal timer to contol all PWM pins. These means all the pins share the same frequency but can have different duty cycles
- The
Servoclass uses 50 Hz, but by defaultanalogWrite()uses 500 Hz. - This means that if you are combining
servo.write()with DC motors or LEDs that useanalogWrite(), the servo won’t work properly because the Photon 2 will switch to the wrong frequency - The solution is to use specify
analogWriteto use 50 HzanalogWrite(PIN, VALUE, 50);
Servo Limitations
- Small hobby servos usually have a small plastic tab that keeps the armature from rotating past a certain point
- Rotating beyond this point usually breaks the small plastic tab
- This creates a continuous servo
- Important
- Our servos require 5v so they will not work with a LiPo battery (3.7v).
- If you want to use a servo with a LiPo battery, see these instructions
Controlling a Servo
- We can use a potentiometer to control a servo’s positioning
-
Potentiometers have values 0 – 4095
-
Have to scale that value to be 15 – 165
- Use the map() function
map() Function
map(value, fromLow, fromHigh, toLow, toHigh)

// value – value we want to convert
// fromLow – input low value
// fromHigh – input high value
// toLow – output low value
// toHigh – output high value
map() Function
int potVal = analogRead(POTPIN);

int angleVal = map(potVal, 0, 4095, 15, 165);
Fixing Servo Jittering
- In some cases, the servo may start to make noise, stutter, or become hot when not it use
- This can be due to a variety of factors such as unstable current supply or interrupts in the Photon 2 execution
- IF this happens, one simple solution is to
attachbefore using the servo, and thendetachafter
Fixing Servo Jittering - Code
const int SERVO_PIN = D2;
Servo servoObj;
void setup(){ /*no attach code */ }
}
void loop(){
    servoObj.attach(SERVO_PIN);
    servoObj.write(15); //write the servo to position 15 degrees
    delay(1000); //wait one second
    servoObj.write(90); //write the servo to position 90 degrees
    servoObj.detach();
}
Reminder: Photon 2 PWM Pins
- Only certain pins support PWM
D1(SCLorA4)A2A5MISO(D16)MOSI(D15)
Exercise
- Connect a servo and write code to sweep through the entire range of value (Remember: use
15and165instead of0and180to avoid damaging servo) - Connect a potentiometer to control the position of the servo
- Using tape, connect your DC motor (with fan blade) to the servo. With the fan spinning, use the pot to control the position of the fan
- Now use the pot to control the speed of the fan while the servo rotates continuosly
Wiring

Motor Controller Wiring Guide
| Motor Controller | Photon 2 | DC Motor |
|---|---|---|
| PWMA | A5 | - |
| AI2 | D4 | - |
| AI1 | D3 | - |
| AO1 | - | Motor wire (either) |
| AO2 | - | Motor wire (either) |
| VCC | 3v3 | - |
| GND | GND | - |
| VM | 3v3 | - |
| STBY | 3v3 | - |